Creating and adding Sections and Elements to BOQ
Last updated August 5, 2024
You can create Bill of Quantities (BOQ),by adding sections and elements in "My Scope" tab inside the "BoQ Module".
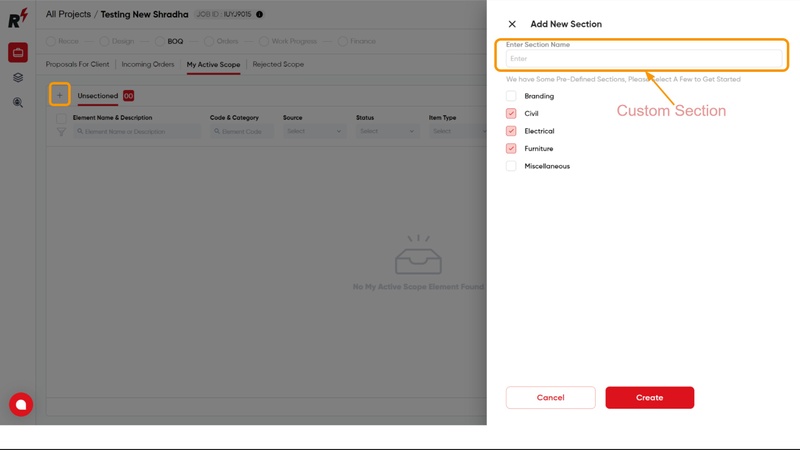
A section can be added by clicking on the plus icon at the left. You can either choose from a list of predefined sections or add new ones. For adding custom elements, click 'Action,' select 'Add Custom Element,' fill in the details, and click 'Create.' You can import elements from 'Element Library' or 'Different Projects,' through the 'Actions' button.
For better understanding please watch this tutorial video.
You can also refer to this step by step guide to help you through Scope creation -
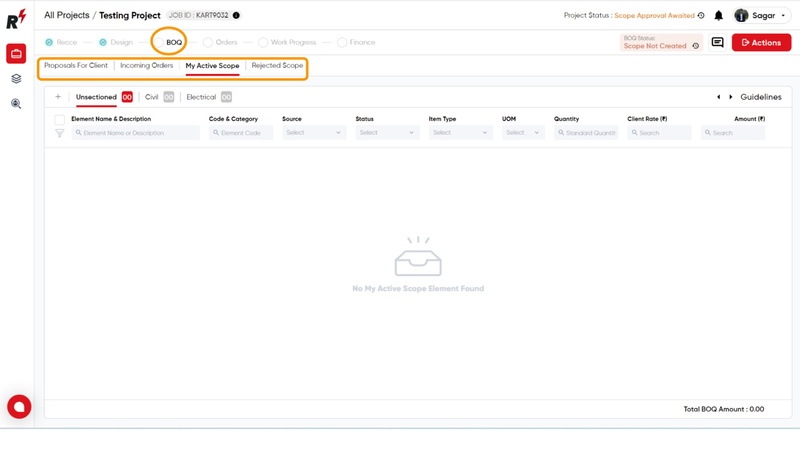
The BOQ module is a crucial part of the project life cycle, and in R'Dash, it can be accessed by clicking on the project and then navigating to the BOQ module. There are four tabs within the module(Proposal For Client, Incoming Order, My Active Scope and Rejected Scope),and the default landing page is the Active Scope tab.
By clicking on the + icon button within the My Active Scope tab, you can add pre-defined sections or create custom sections by entering the name in the "Enter Section Name" field.
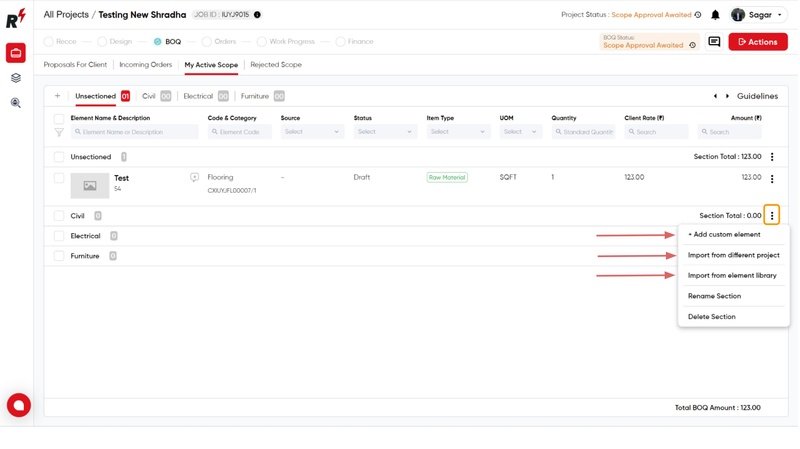
Clicking on the three dots icon next to a section reveals three options for adding elements to the scope: Add Custom elements, Import from a different project, and Import from the element library.
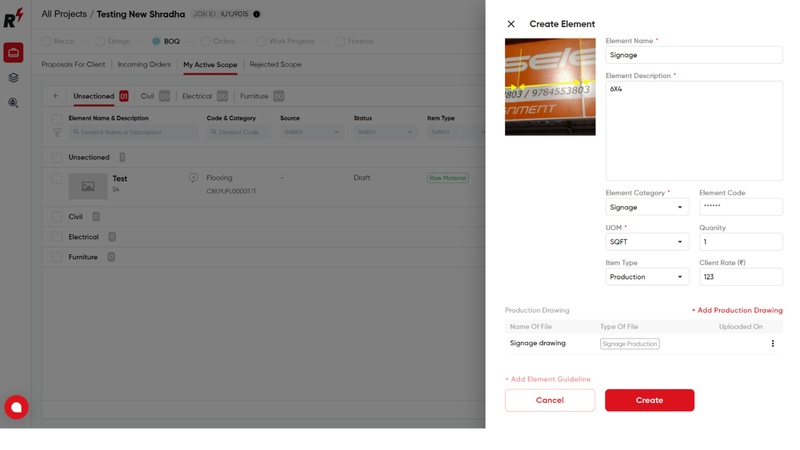
First method of adding elements to the BOQ is through the "Add Custom Element" option, which involves manually entering the element details.
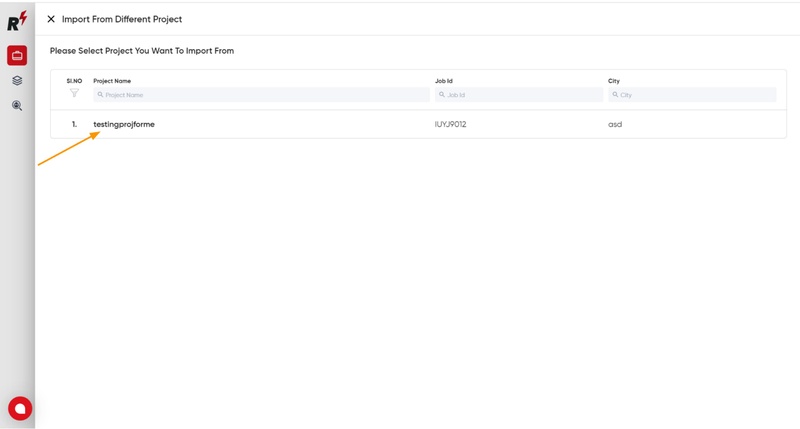
Second method of adding elements to the BOQ is through the "Import from different Project" option, which basically imports the elements from a different project. "Select the Project"
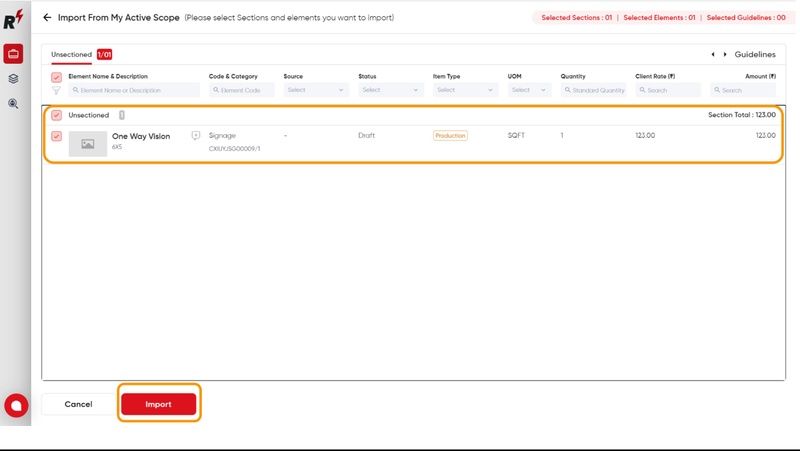
Now Select the Element that you want to import,then Click on the import button.
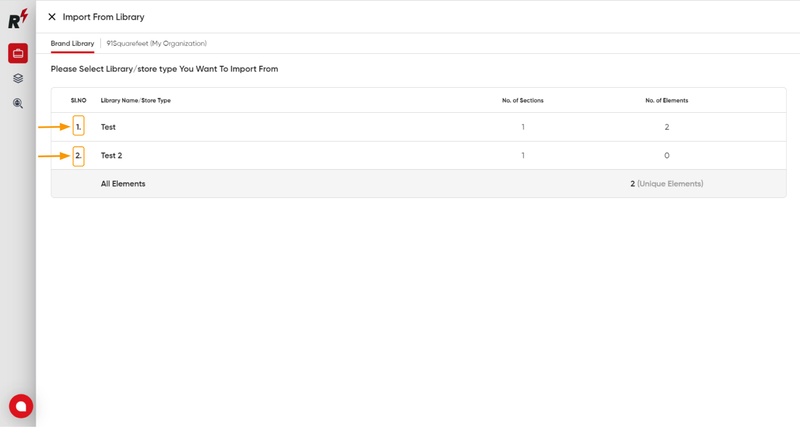
The third method to add elements to the active scope tab in the BOQ module is by importing from the element library, which is an essential method for adding elements. Select the Store type of the Brand
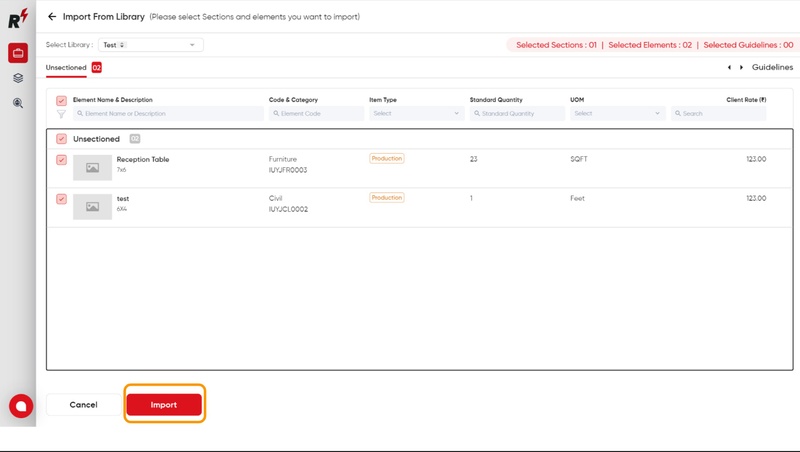
To import elements into the BOQ active scope, simply select the desired elements to be imported.
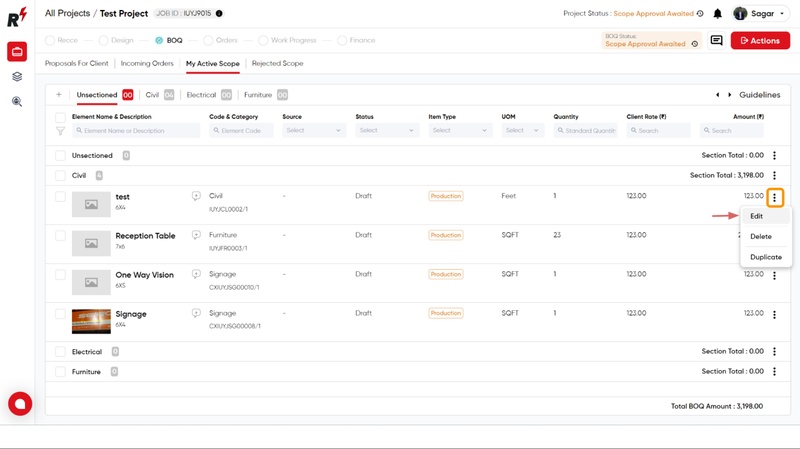
Users can edit an element by clicking on the three dots icon which is located next to the element.
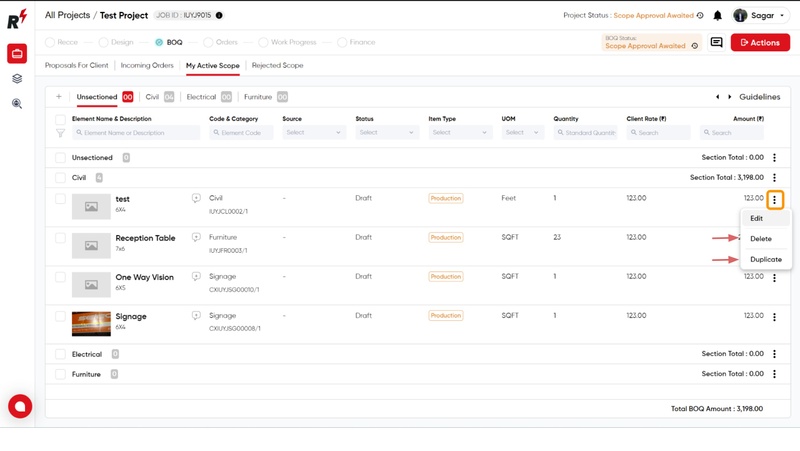
Users can also delete an element by clicking on the three dots icon which is located next to the element.
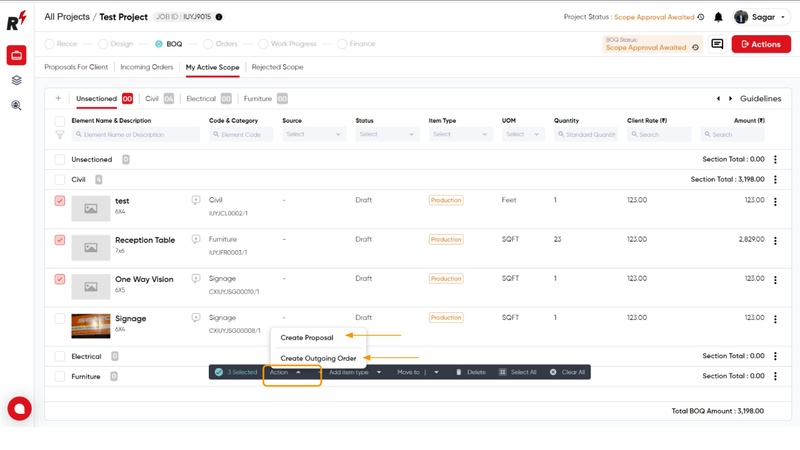
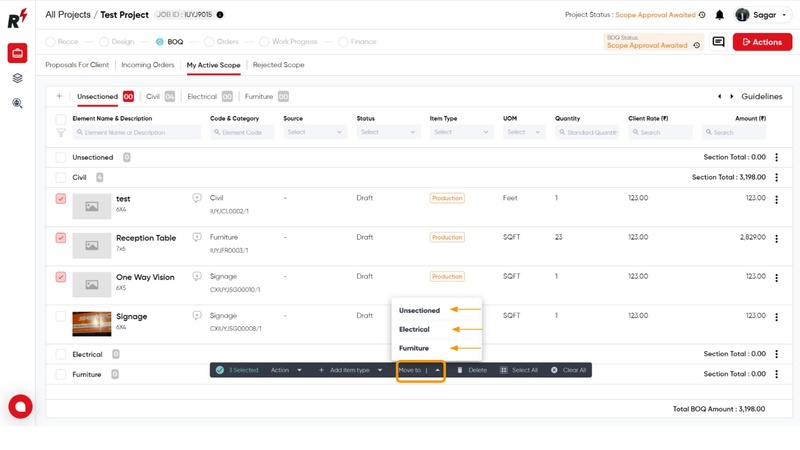
Users have the option to select elements in the BOQ to create proposals for clients or outgoing orders for vendors. This can be done by selecting the desired elements and clicking on the "Action" button below.
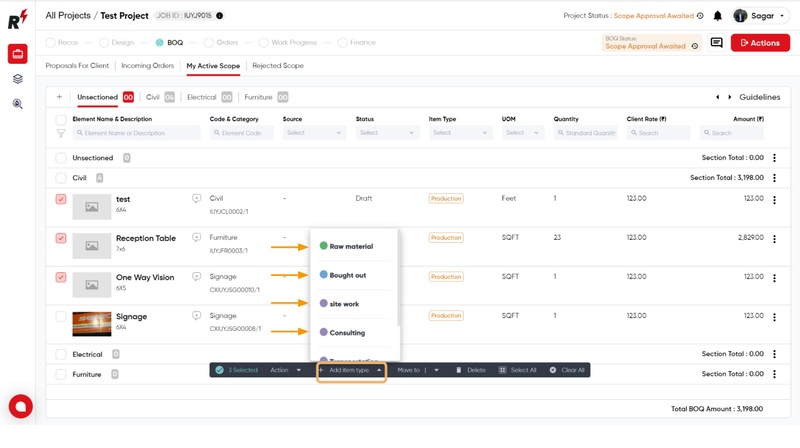
To add or change the element type for multiple elements simultaneously, users can select the desired elements and click on the "Add Item Type" button located below.
To move elements to another section, select the desired elements and click on the "Move To" button located below. Then, choose the section where you want to move the selected elements.
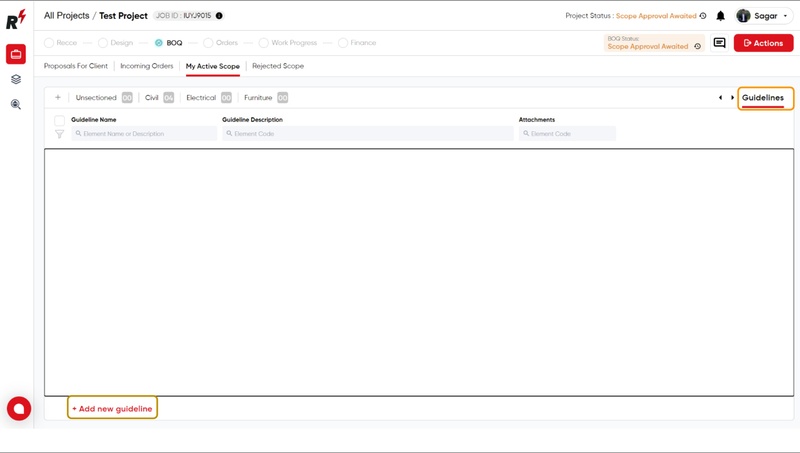
As an instruction for the library, the Bill of Quantities (BOQ) guideline can be added to the active scope by clicking on the "Add New Guideline" button at the bottom of the guideline page. This will provide clear DO's and DON'T's for the library, ensuring a professional and effective approach to managing its resources.
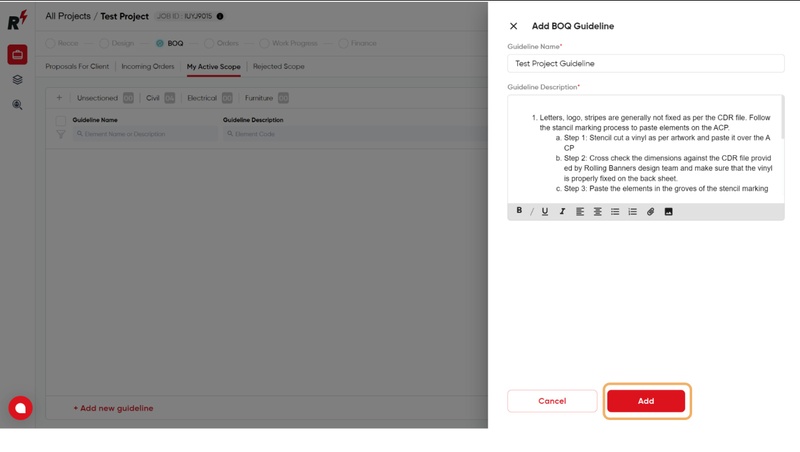
After Clicking on the Add new Guideline, you have to enter the Guideline Name and Description, and then click on the add button.
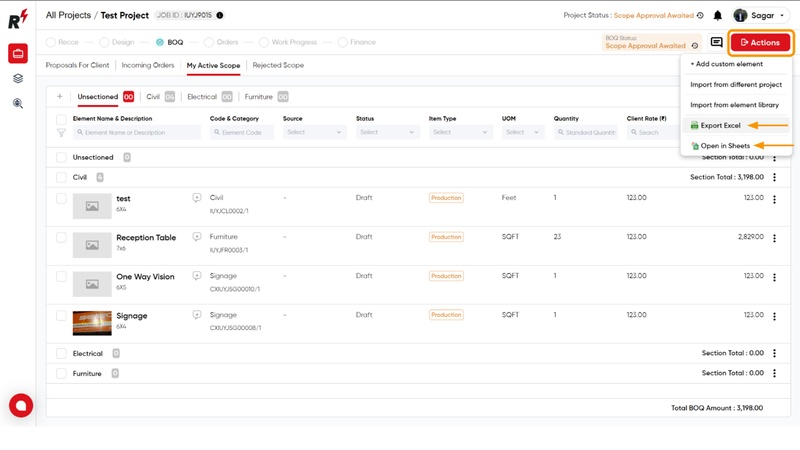
After adding all the elements and guidelines to the BOQ, you can download it in Excel format and Google Sheets by clicking on the "Action" button and selecting the "Export in Excel" or "Open in Sheets" option. This will enable easy access to the BOQ and its guidelines in a professional and user-friendly manner.
