Creating a Rate Contract
Last updated August 7, 2024
You can create rate contracts in both "My Libraries" and "Shared Libraries" under "All Libraries" on the left panel. A Rate Contract can be created for either a buyer or a supplier. You can name the contract, add buyer and vendor details, and set relevant dates. Required elements can be imported from the element library and contract rate for each item can be set. Additionally, you can add a rate contract document and payment terms. You need to activate the rate contract for it to be used.
For better understanding please watch this tutorial video.
You can also refer to this step-bystep guide to help you through creating a Rate Contract:
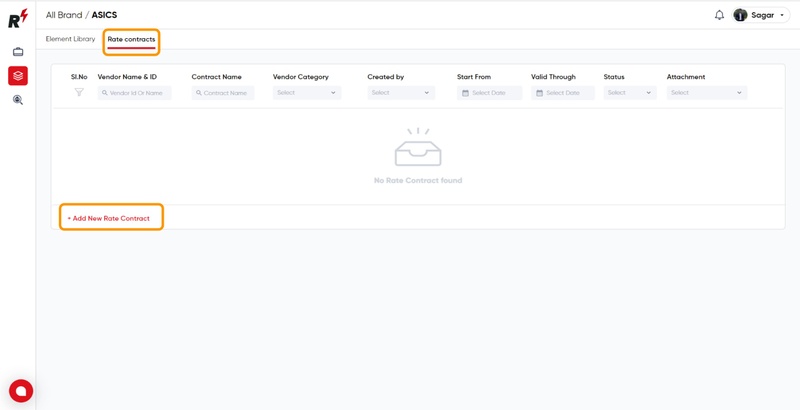
To create a brand-specific rate contract with a vendor, click on the "Rate contract" tab in the Element library and select "Add new rate contract."
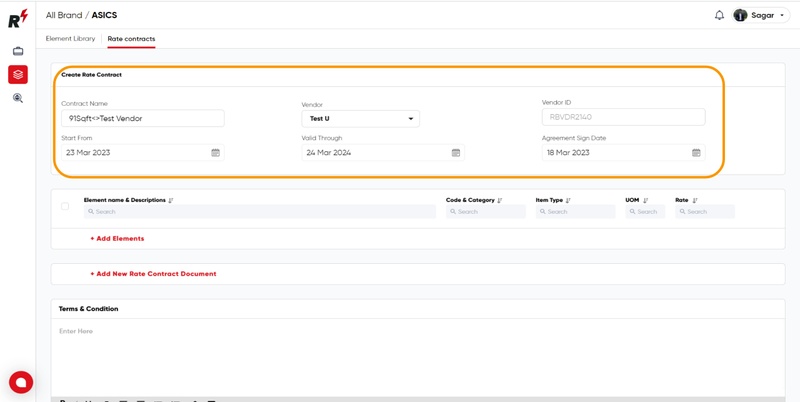
To complete the rate contract, fill in the mandatory fields, such as the contract name, start date, end date, and other required information.
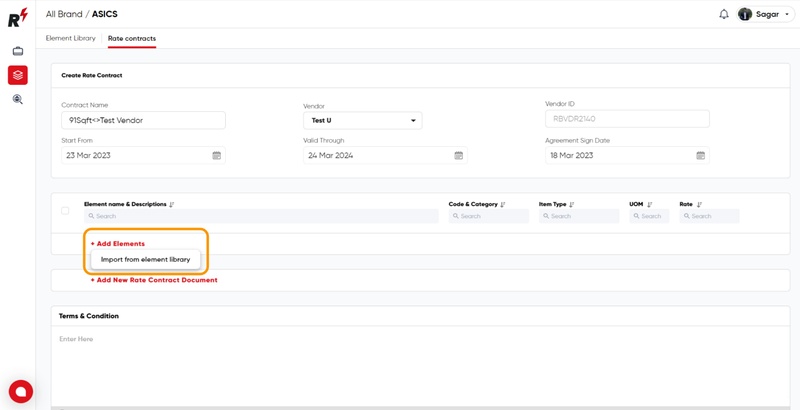
To add elements to the rate contract, select the "Import from Element Library"
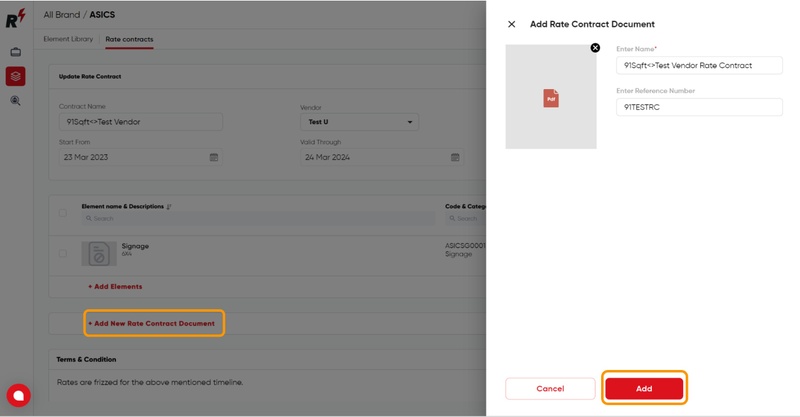
To include an agreement sign document file in the rate contract, there is an option available to add the file.
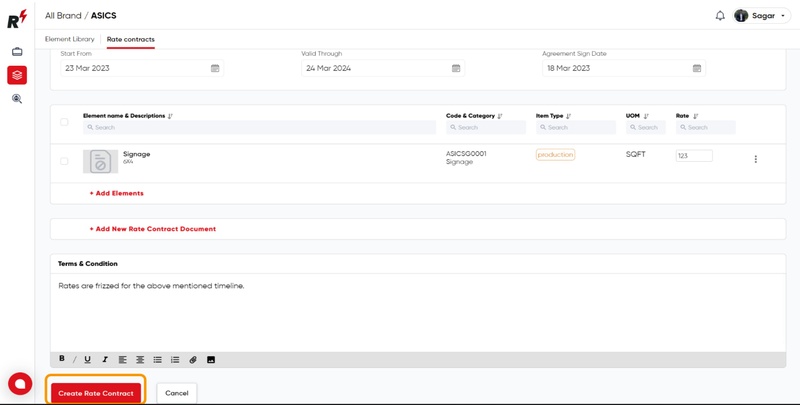
Once elements are added to the rate contract, you can include any relevant terms and conditions and then click "Create Rate Contract" to finalize the process.
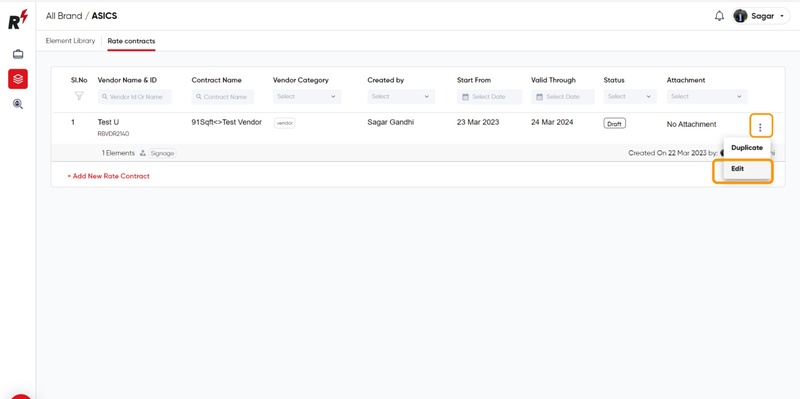
To make changes to a created rate contract, click on the three dots icon of the contract and select the "Edit" option.
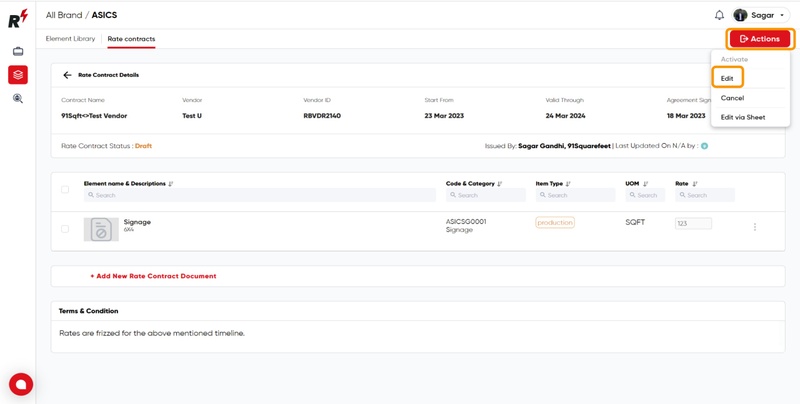
User can also make changes to a created rate contract, click on the Actions Button icon of the contract and select the "Edit" option.
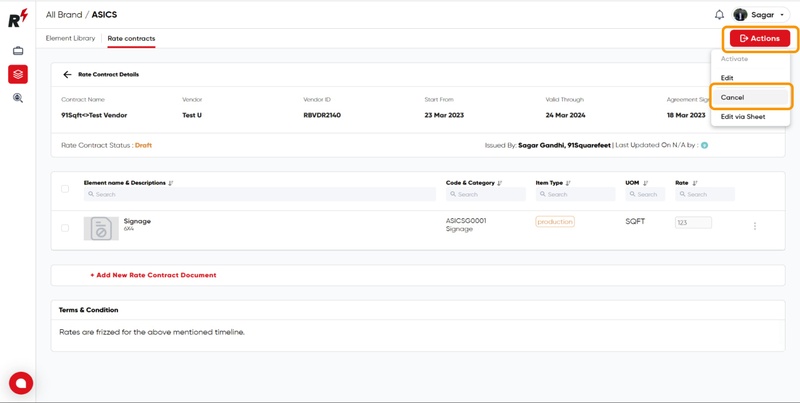
To cancel a rate contract, click on the contract and select the "Action" button, then choose the "Cancel" option to complete the cancellation process.


