
Outgoing Orders
Last updated March 24, 2023
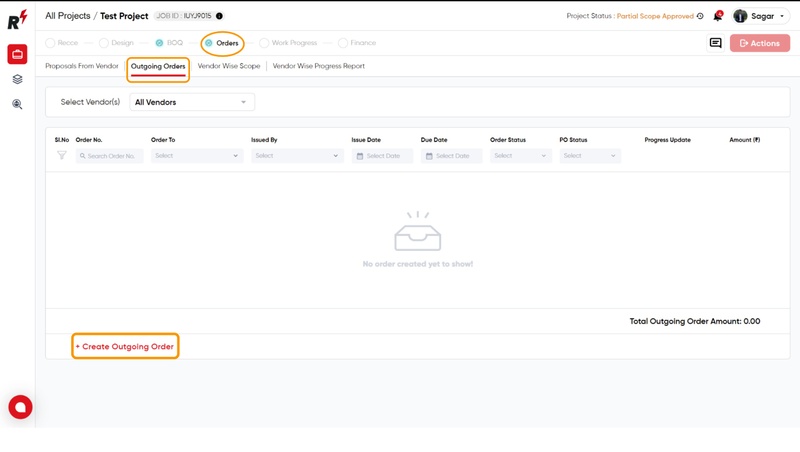
To access the order module of a project, click on the "Order" tab. The module has four tabs: "Proposal from Vendors," "Outgoing Order," "Vendor-wise Scope," and "Vendor-wise Progress Report." The "Outgoing Order" tab is the default landing page.

Proposal from Vendor The "Proposal from Vendor" tab displays proposals received from vendors. You can approve or reject these proposals if their status is pending.
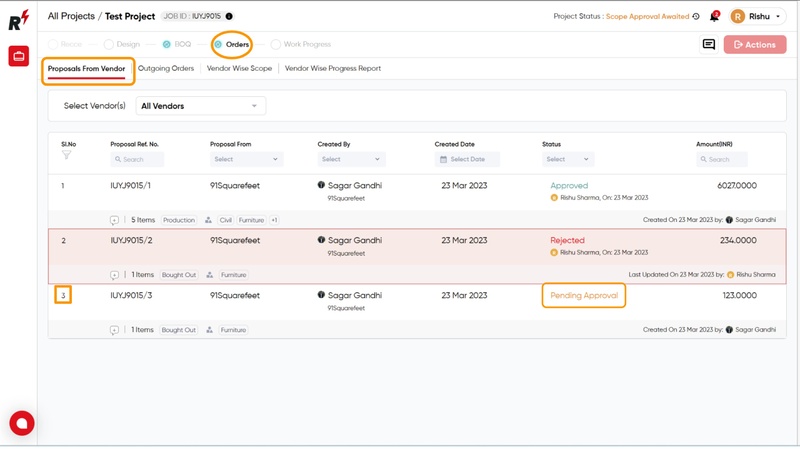
When viewing a proposal with a "pending" status, you can only approve or reject it. Editing or modifying the proposal is not allowed at this stage.
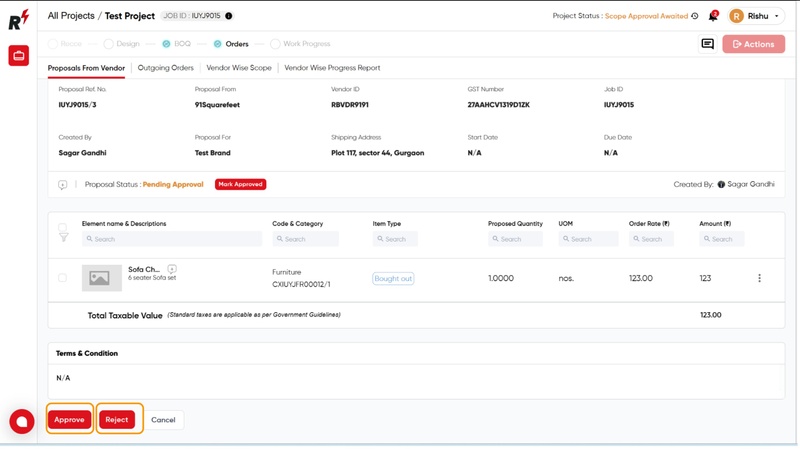
After clicking the approval button, the proposal elements will appear in the outgoing order. You must then fill in all the mandatory fields before proceeding.
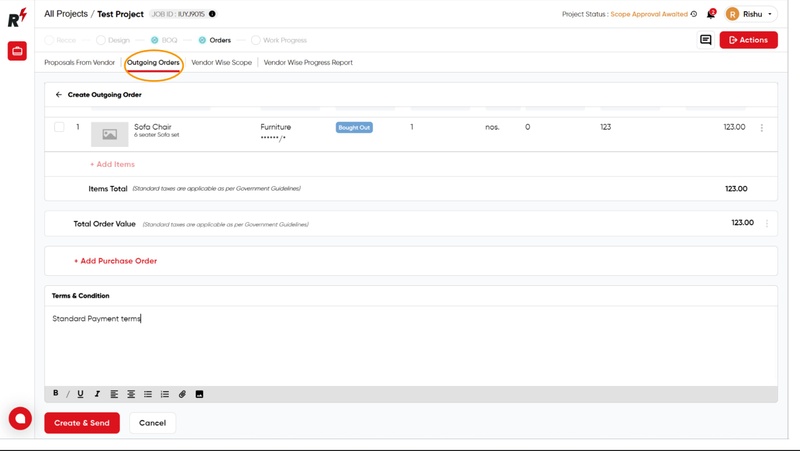
Clicking on the approval button for a proposal will move it to the outgoing order, where you can place an order with the vendor and add the purchase order there. "Add Purchase Order for this order and press the create & send button to send the Order "
Outgoing Order : Users can also create the Outgoing Order directly without the way of Proposal. To create an outgoing Order click on the Outgoing Order button.
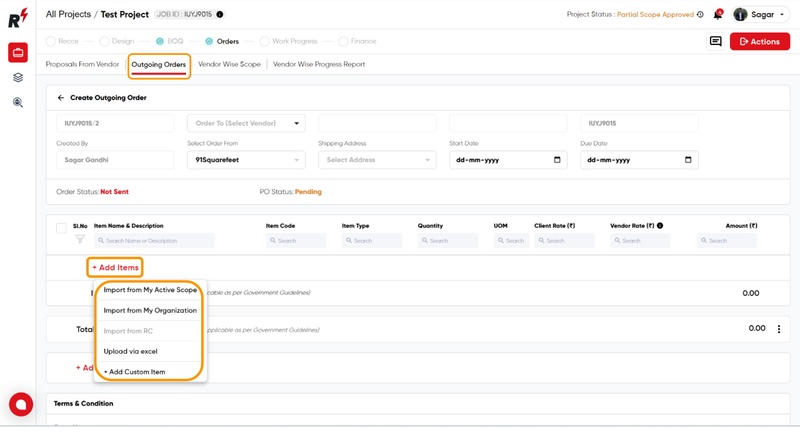
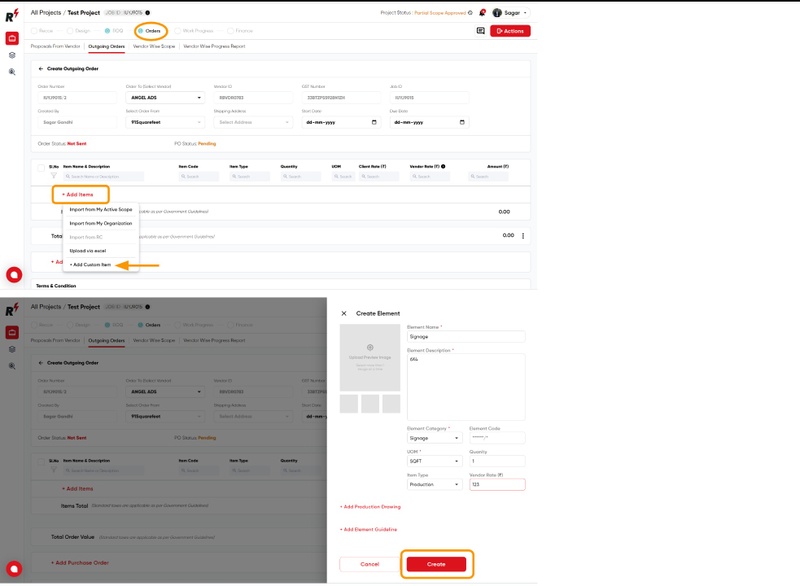
Here are 5 concise methods to add elements in the Outgoing Order:
- Import from Active Scope
- Import from My Organization
- Import from RC
- Upload via Excel
- Add custom element.
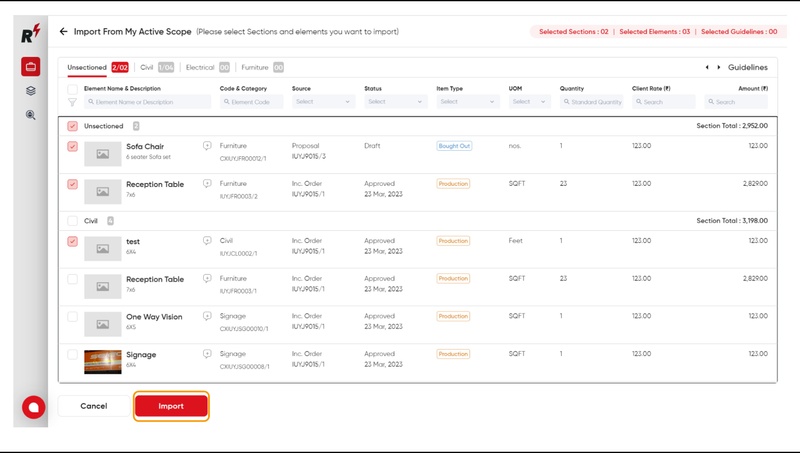
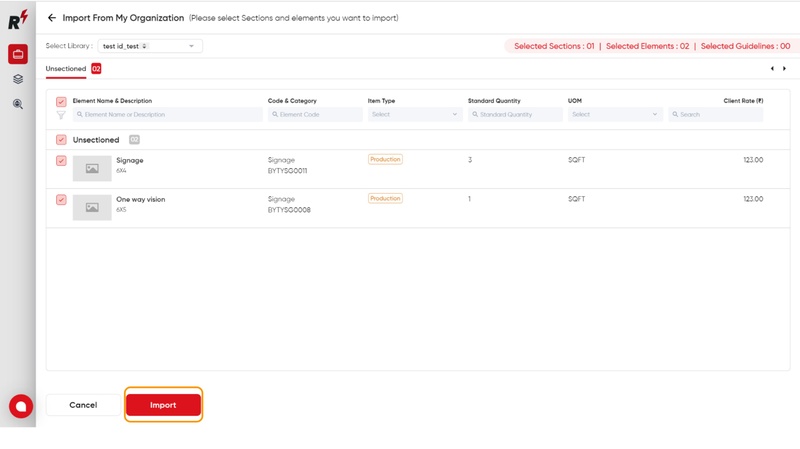
First Method 1 : Import from My Active Scope>Select the elements that you want to import
In addition to the previously mentioned methods, users can also import elements from their organization's library store. By selecting the desired elements from the library, they can easily import them into the outgoing order.
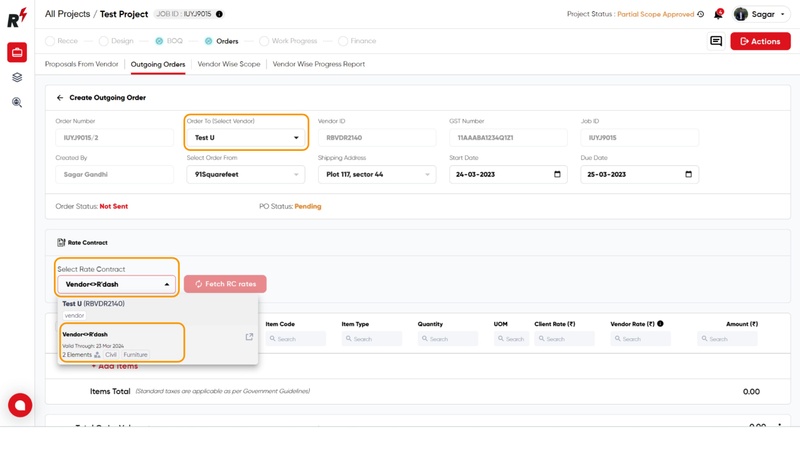
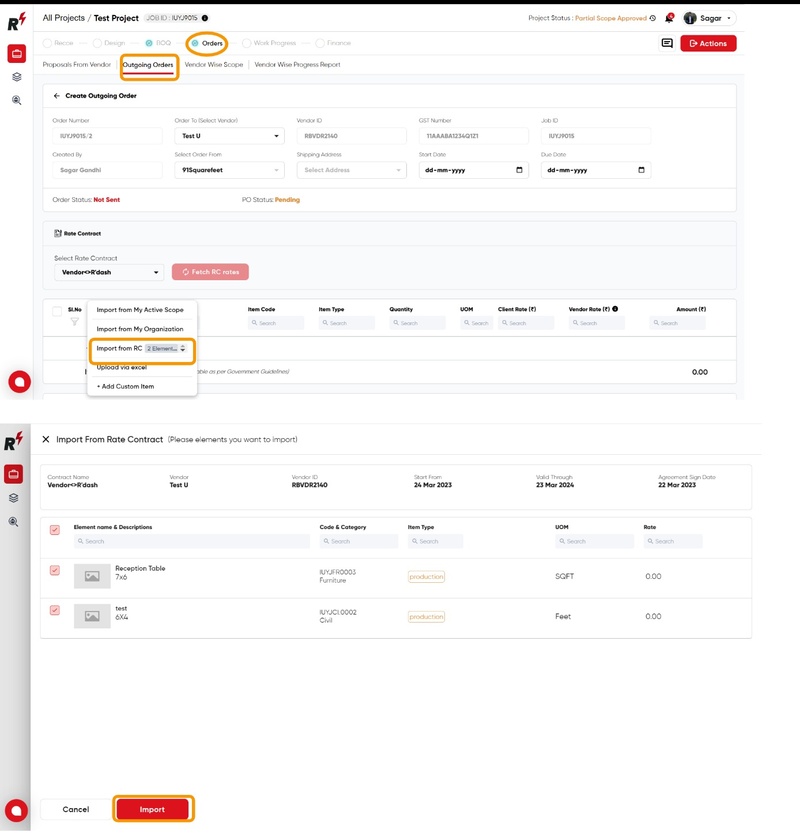
After signing a rate contract with a vendor, you can select them when placing an order and choose the rate contract agreement in the "Select Rate Contract" field. This will enable the option to add elements from the "Import from RC" method and select the specific items you want to order from that vendor.
Method : "Import from RC"
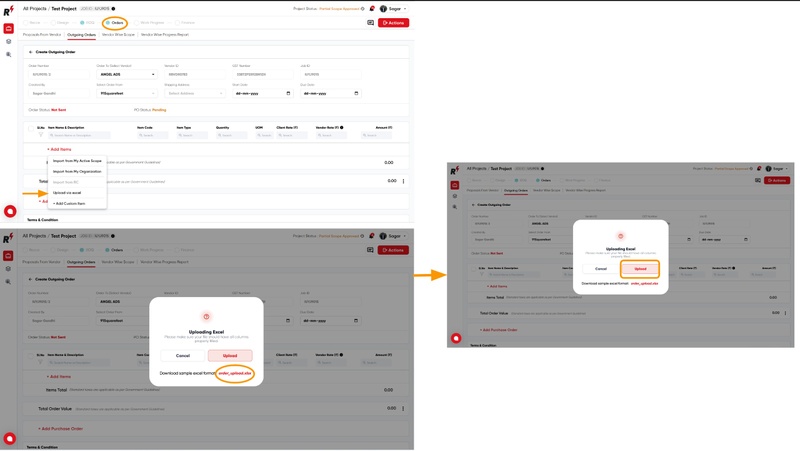
The fourth method for adding elements is "Upload via Excel." To use this method, you'll need to download the sample Excel format and enter the element details into the file. Once you've saved the file, you can upload it to the system to add the elements to the outgoing order.
The final method is adding elements through a custom way. Simply click on "Add Custom Element" and manually enter all the details of the element to add it to the outgoing order.
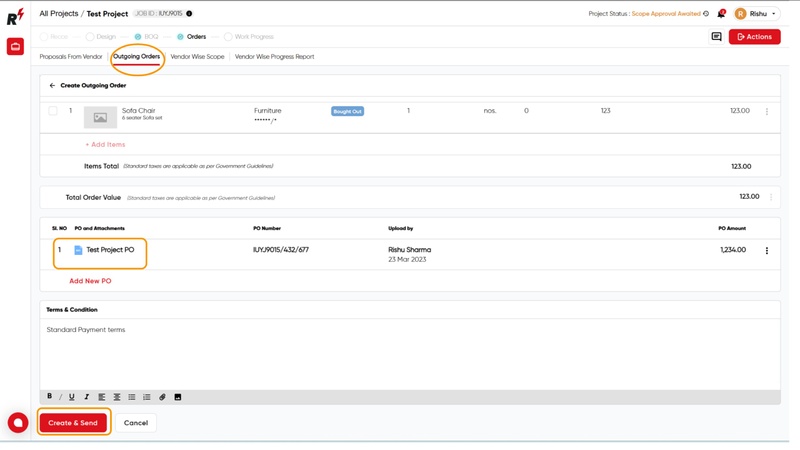
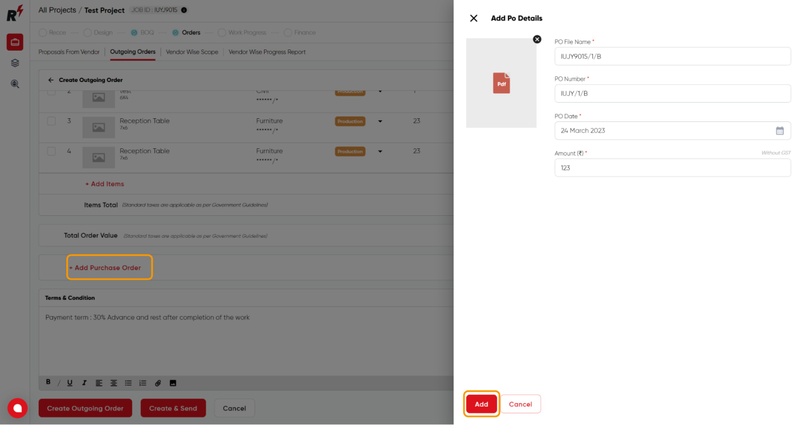
To add a purchase order, simply click on the "Add Purchase" button and upload the PO file while filling out all required fields.
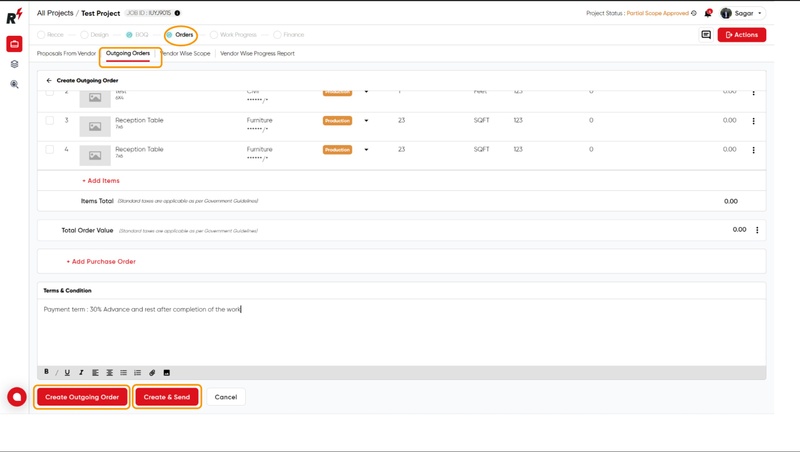
To submit your order, click "Create and send." To save it as a draft, click "Create."
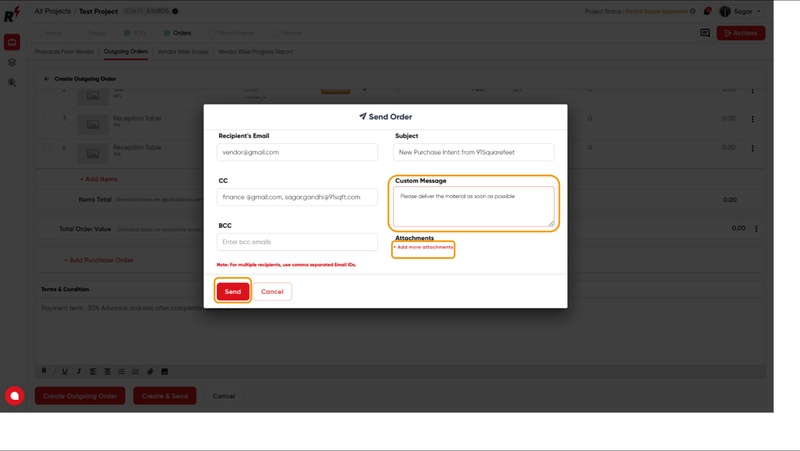
Clicking "Create & send" opens a new window with the vendor's email address auto-filled. Type your message and also you can attach the file by clicking on th e "+add more attachment" button. Once verified all the fields, click the "Send" button. An email will be sent to the Vendor email along with the attached excel file of the order.
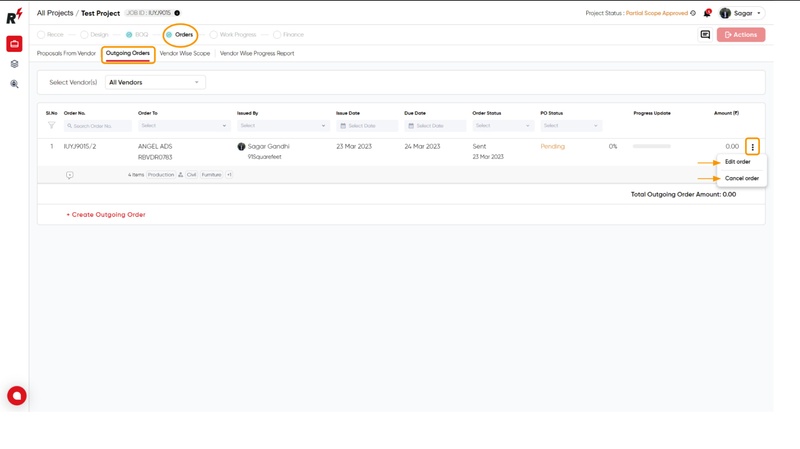
To cancel or edit an order that has been sent to the vendor, click on the three dots icon and select "Edit Order" or "Cancel Order".
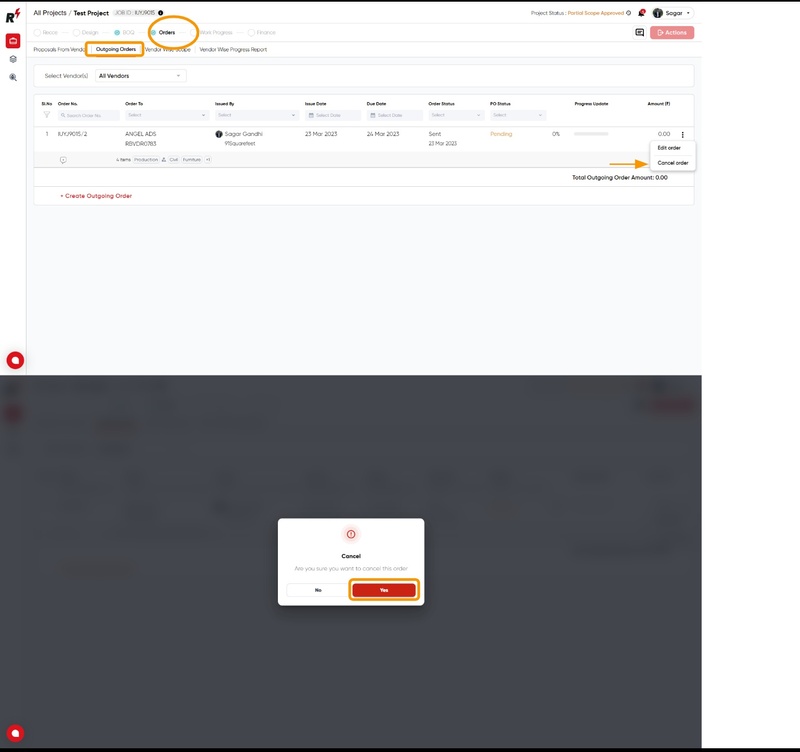
"Cancel Order"
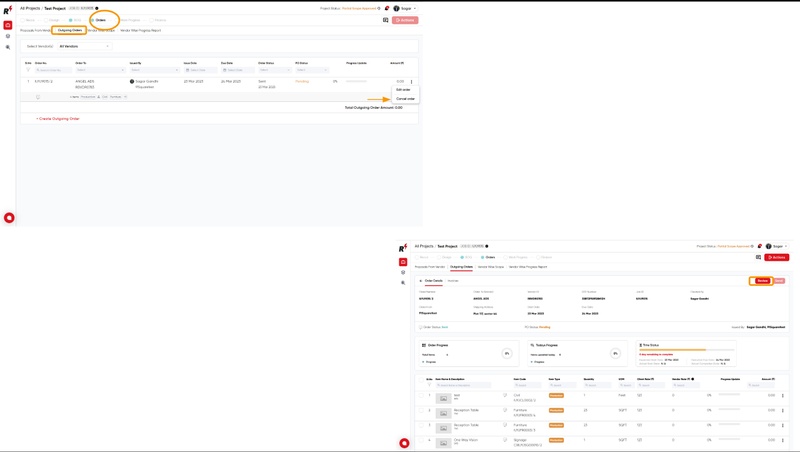
"Edit Order" There are two ways to edit an order. The first method is to click on the three dots and select "Edit Order". The second method is to click on the order and then click on the "Review" button. From there, you can make changes to elements such as quantity and rates, and add new elements to the order. Please note that you cannot change the name or description of an element.
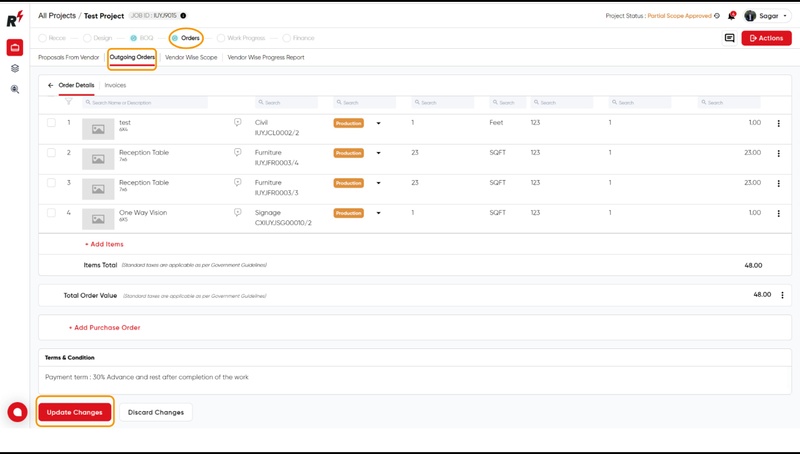
Once you have reviewed and made modifications to the order elements, click on the "Update Changes" button. This will notify the vendor via email about the modifications made to the order, along with the updated Excel file.
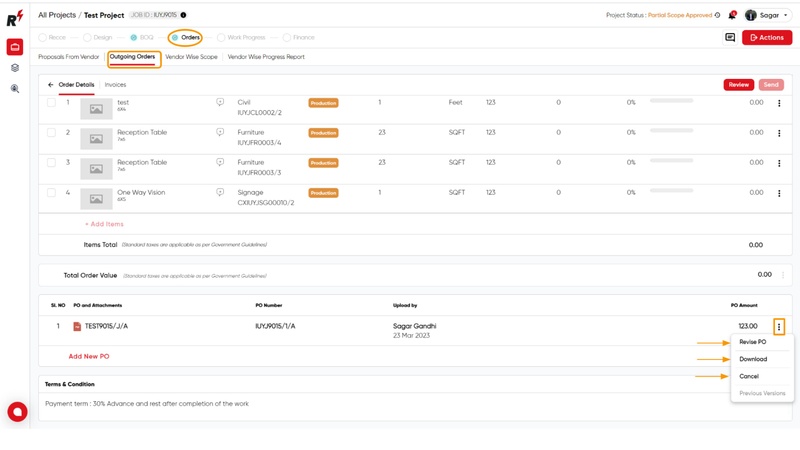
To revise, download, or cancel a PO attached to an order, click on the three dots icon next to the PO. These options will become visible once the icon is clicked.
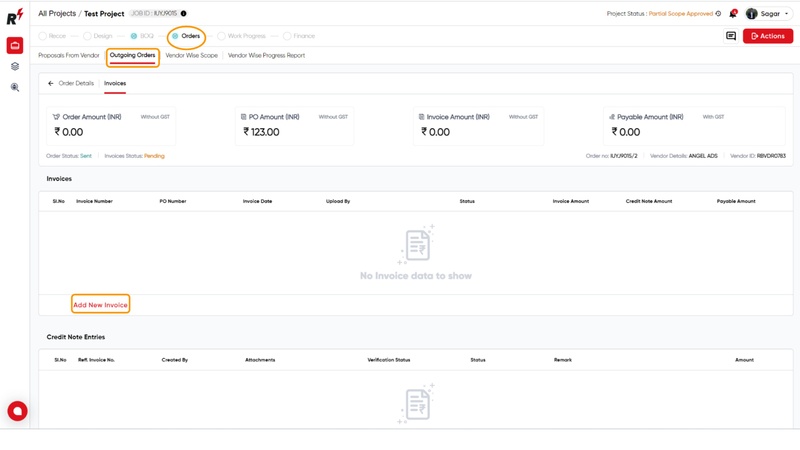
Invoice: After adding the PO to the order, the Invoice tab will become active. You can add the invoice to the order by selecting the PO.
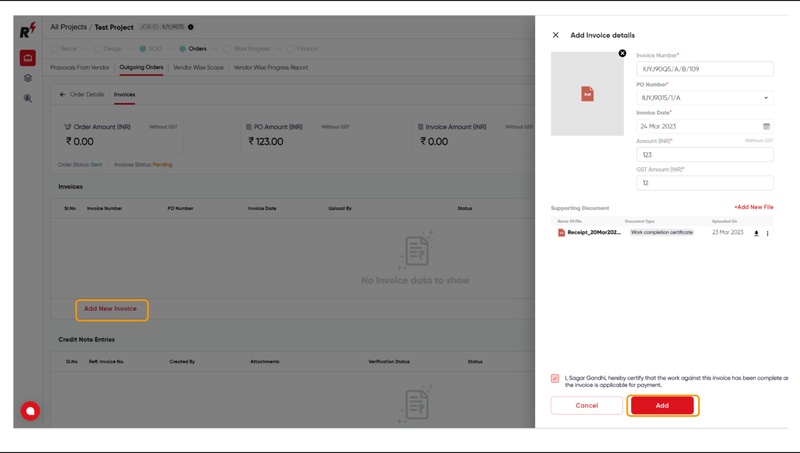
"To upload the invoice, click "Add Invoice" and fill in the required fields. You can also upload supporting documents such as work completion certificates, delivery proof, and warranty certificates. Once done, certify that the uploaded invoice is complete and correct."
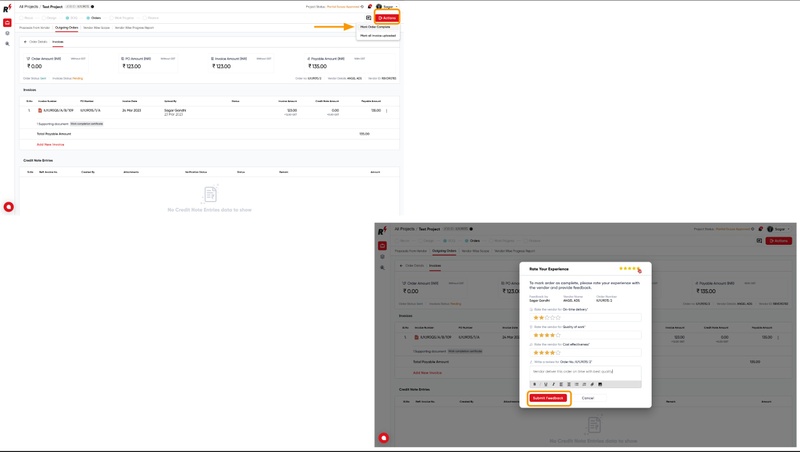
After finishing the tasks for an order, you can mark it as completed by selecting the "Actions" button. From there, you can choose the "Mark all invoice uploaded" option to indicate that all necessary invoices have been submitted.
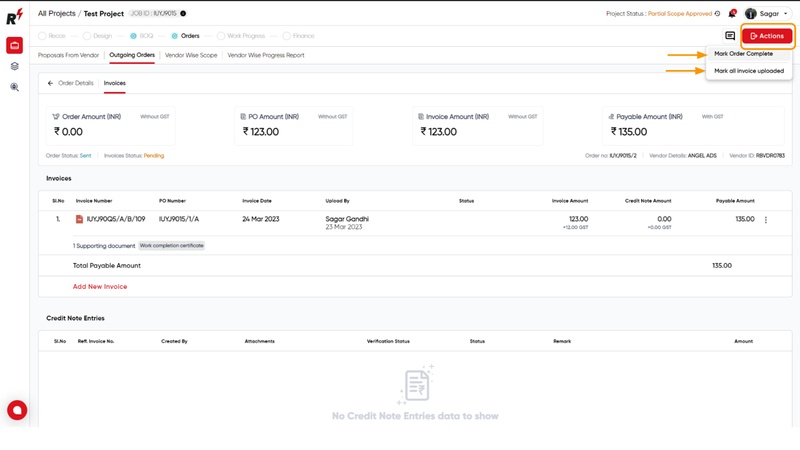
When you click the "Mark Order Complete" button, a survey feedback window will appear. In this window, you can rate the vendor for on-time delivery, the quality of their work, etc. You will also have the option to drop a review for the completed order.