
How to Create & Assign a Snag
Last updated July 25, 2024
You can create a snag on RDash, either on behalf of the client (Snag by client) or on behalf of your own organization (Snag by me). You can upload relevant images, link specific elements from BoQ and assign it to either your organization or to a vendor. One snag can be assigned to multiple organizations.
For better understanding please watch this tutorial video.
You can also refer to this step by step guide to help you through snag creation and assignment -
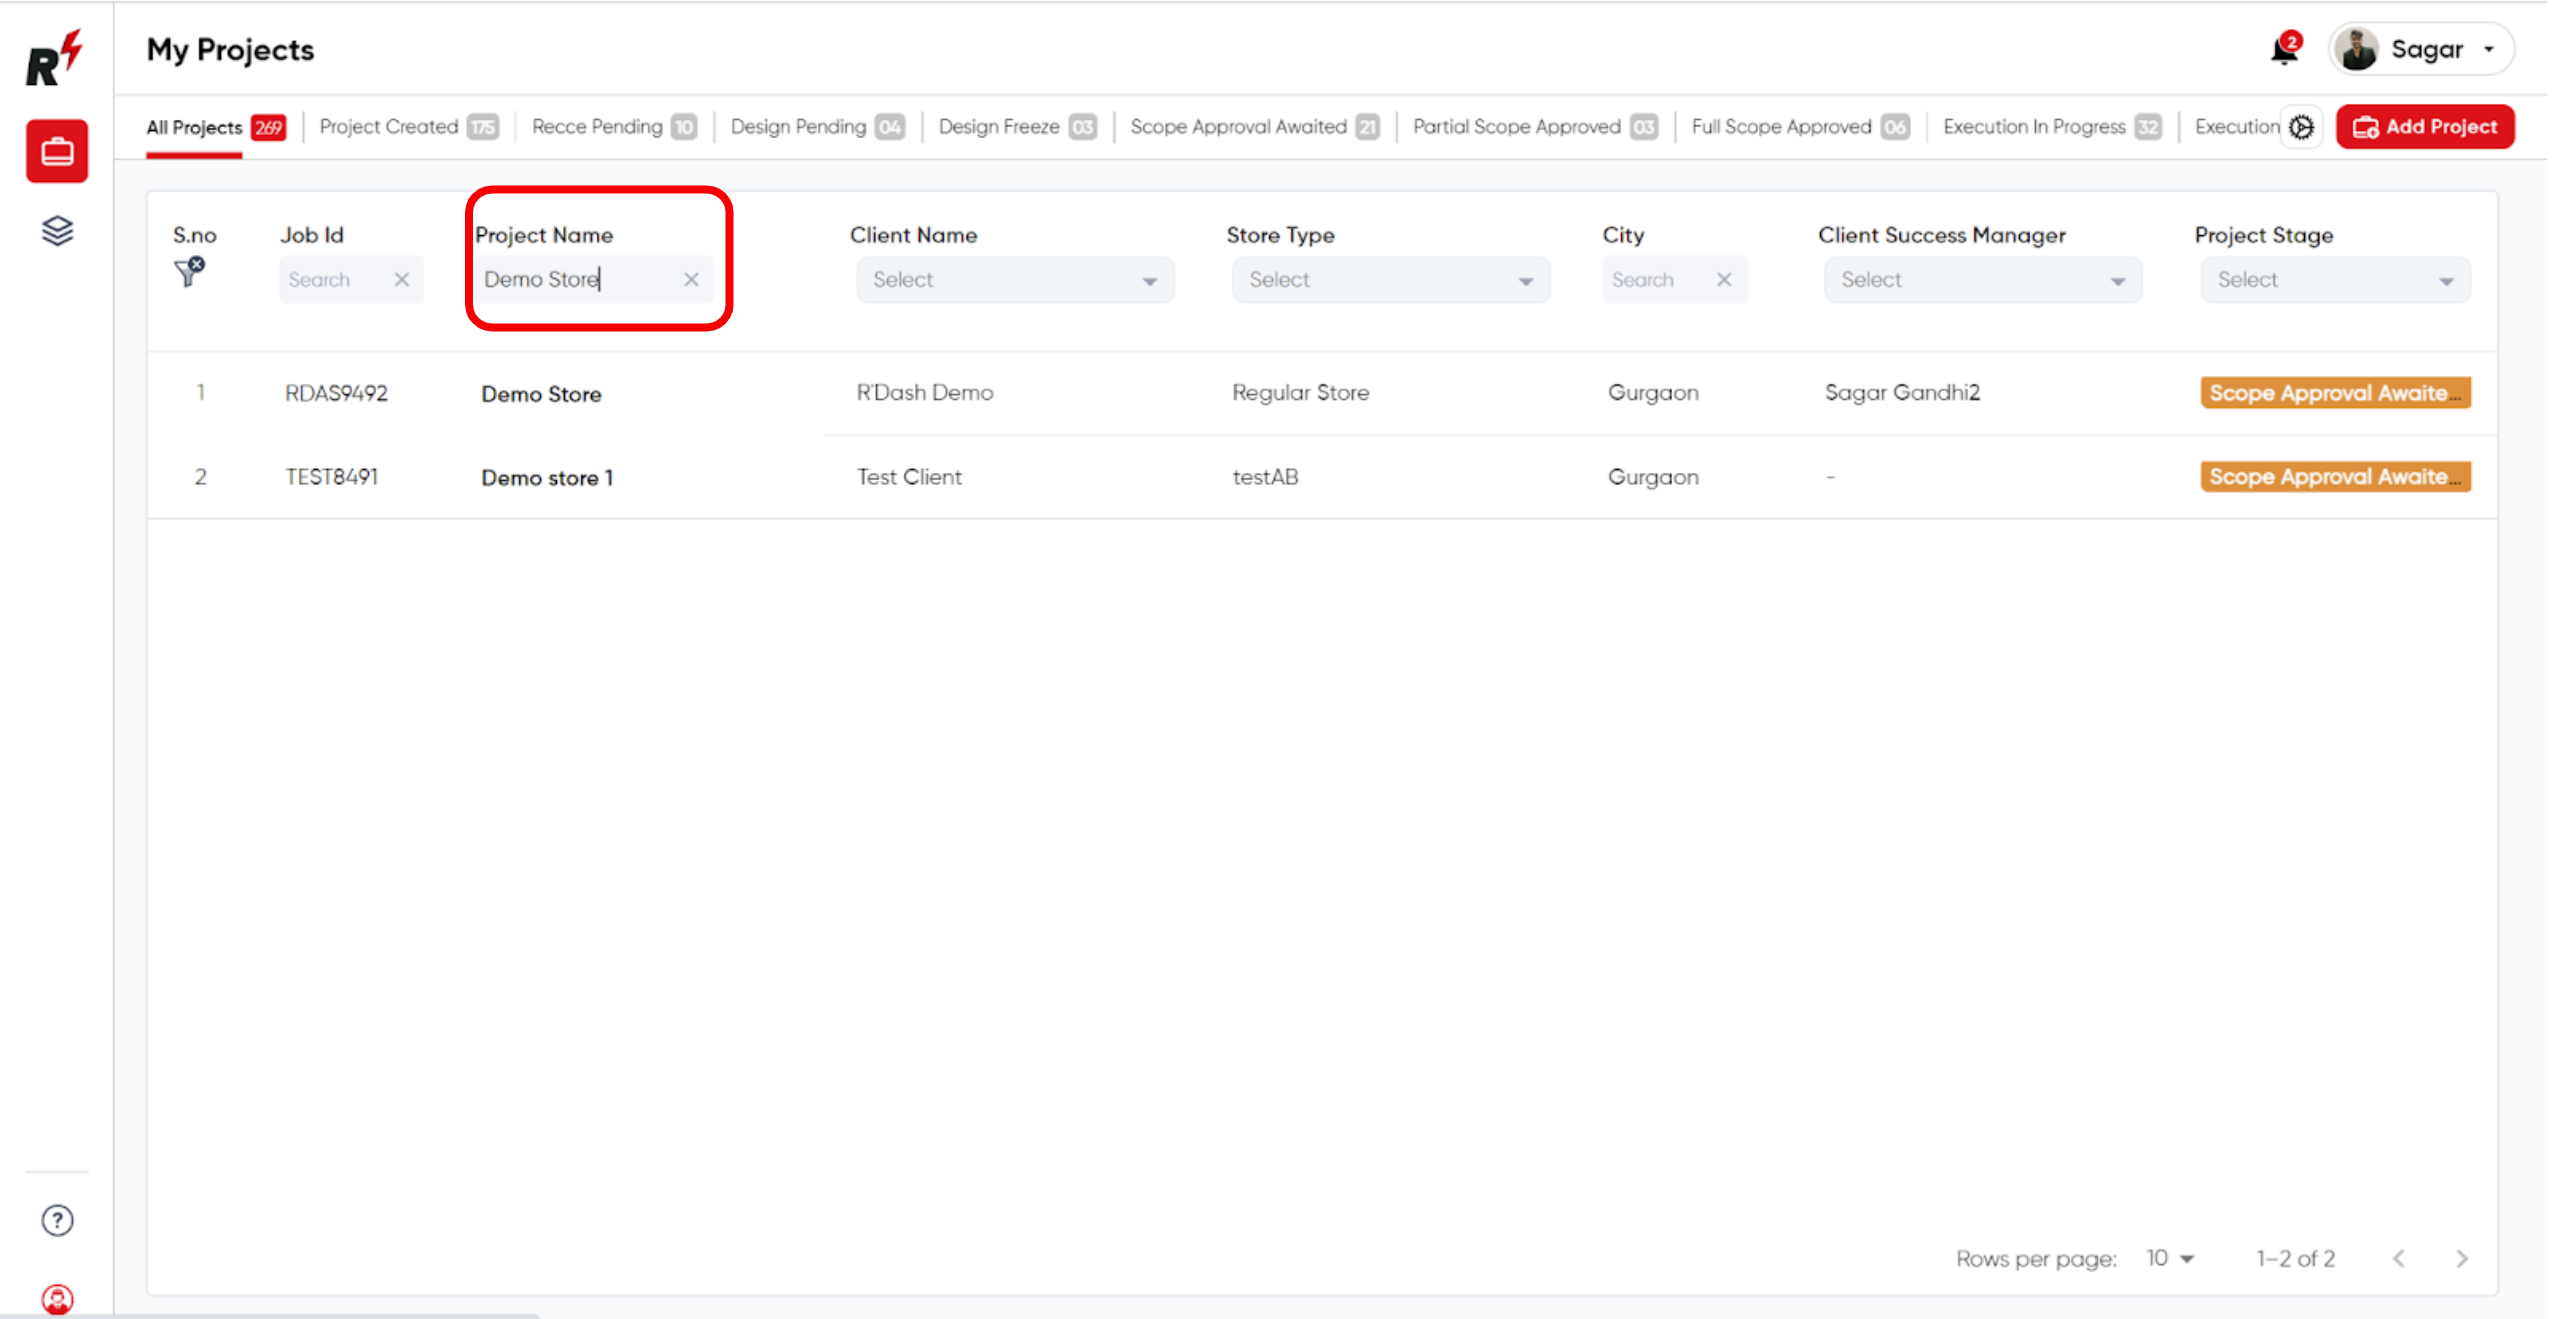
From the list of projects, navigate to the project of your choice.
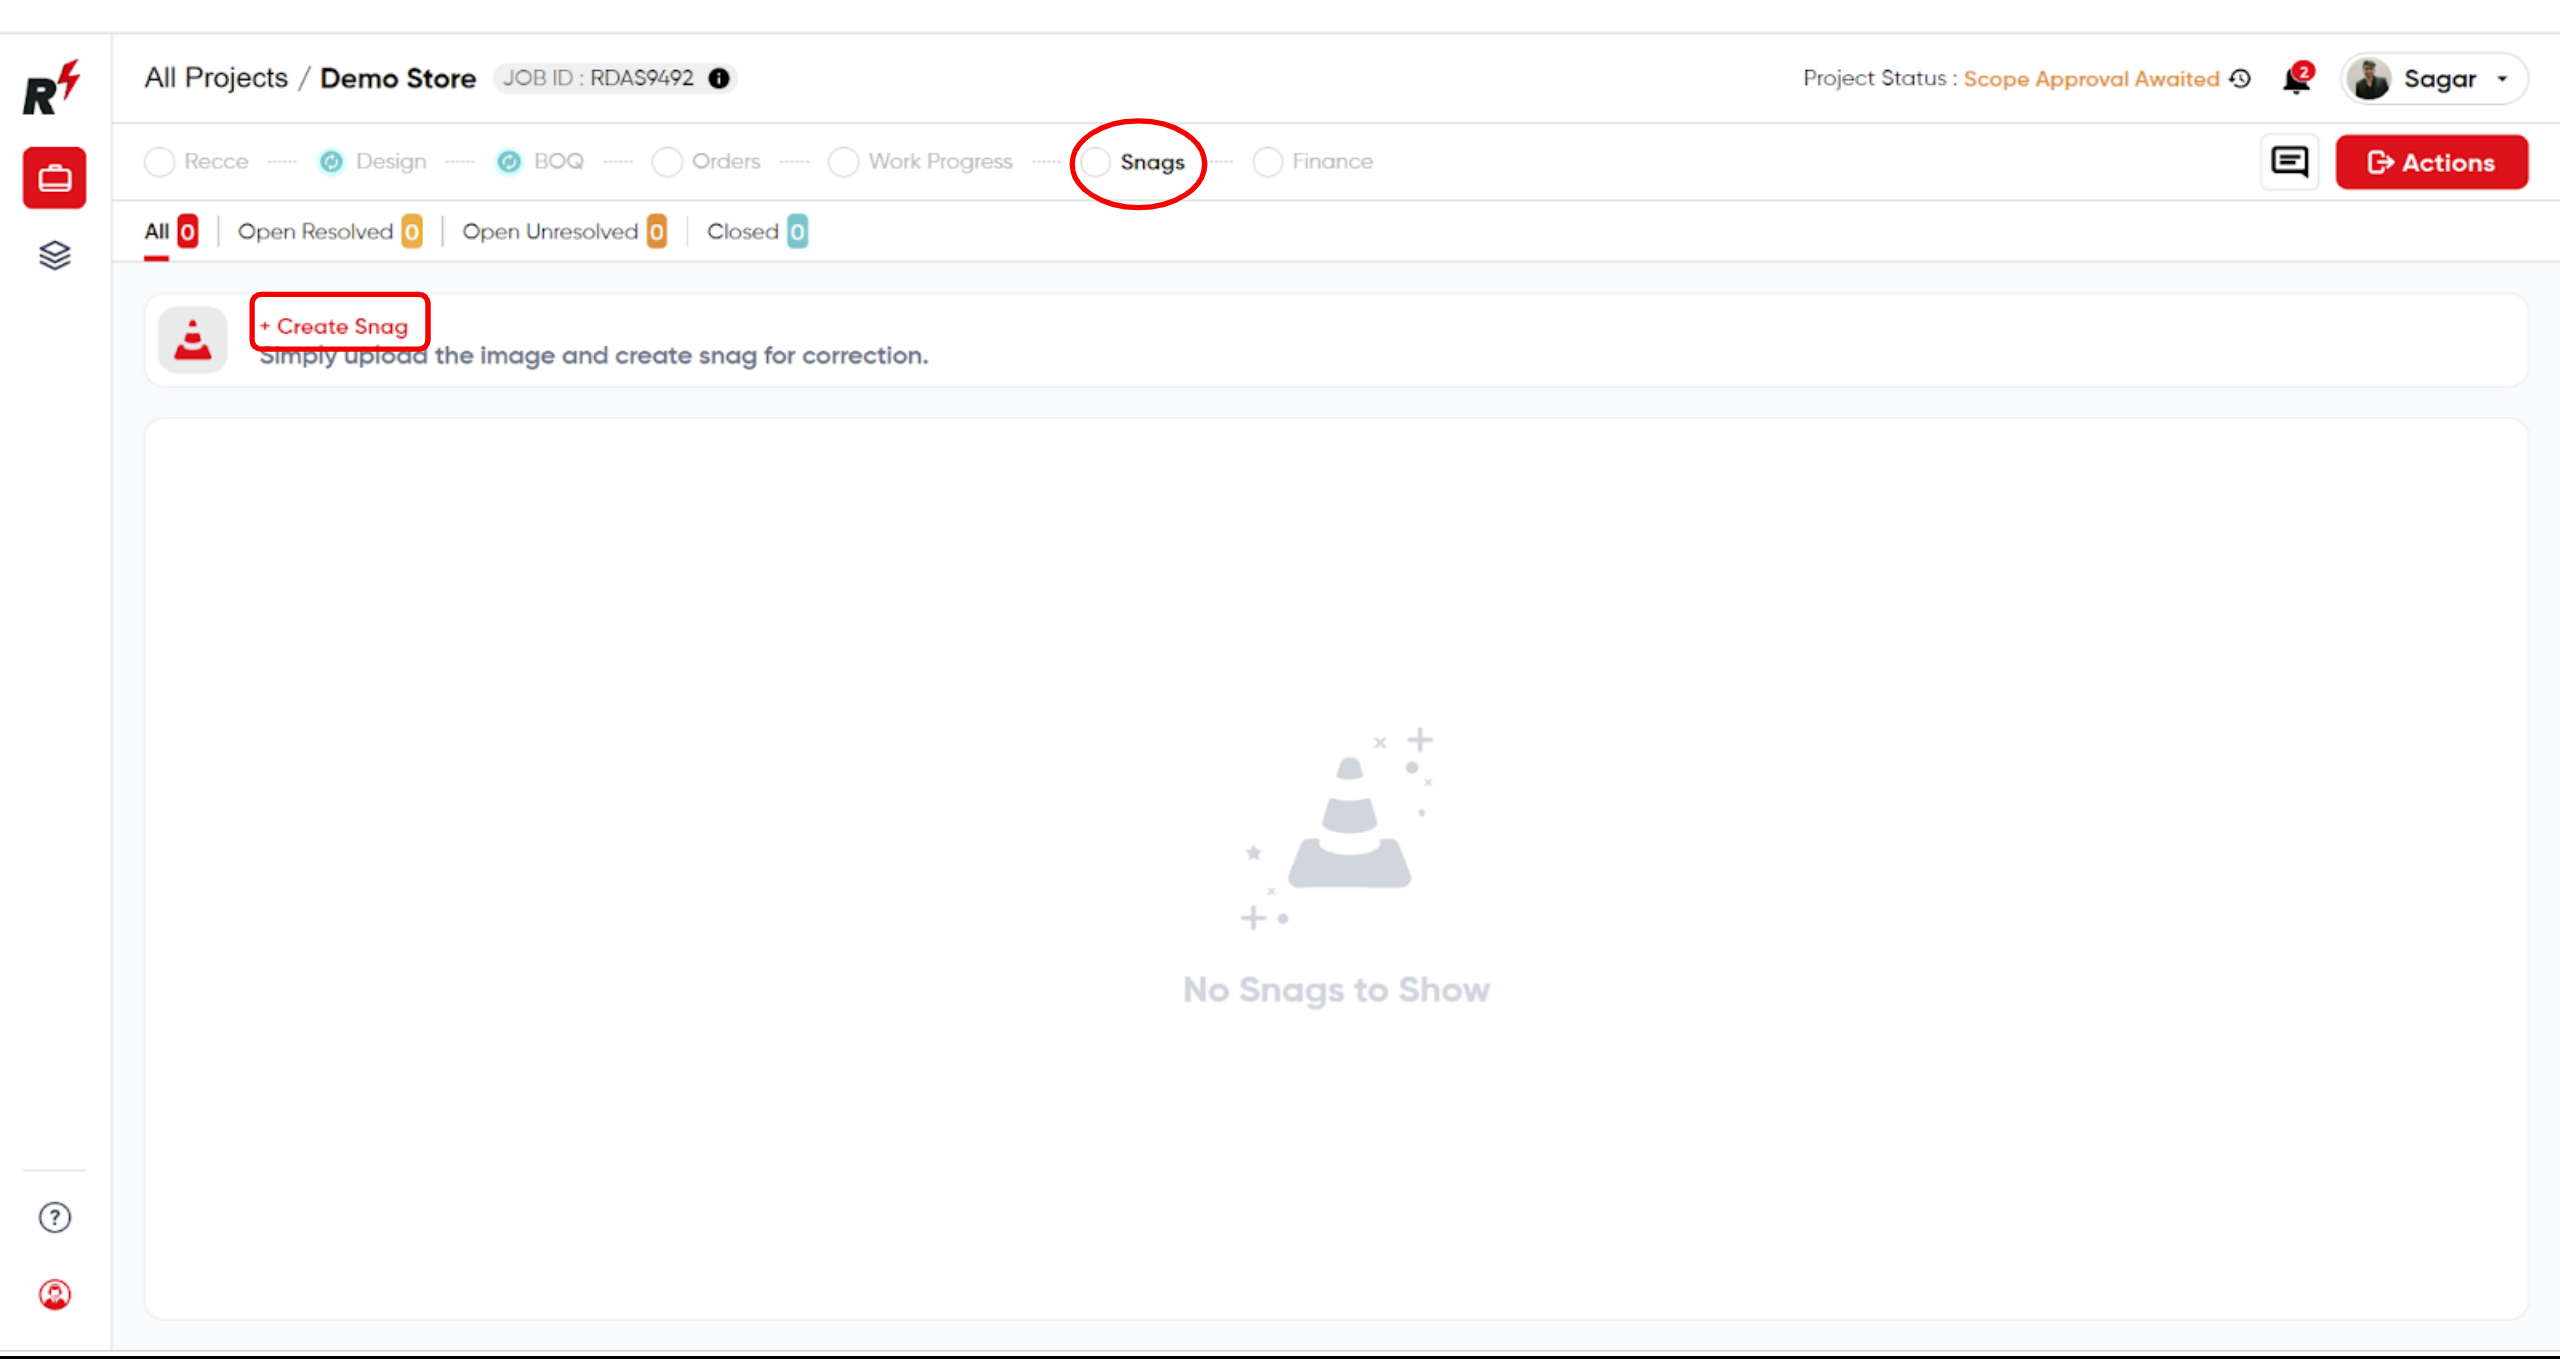
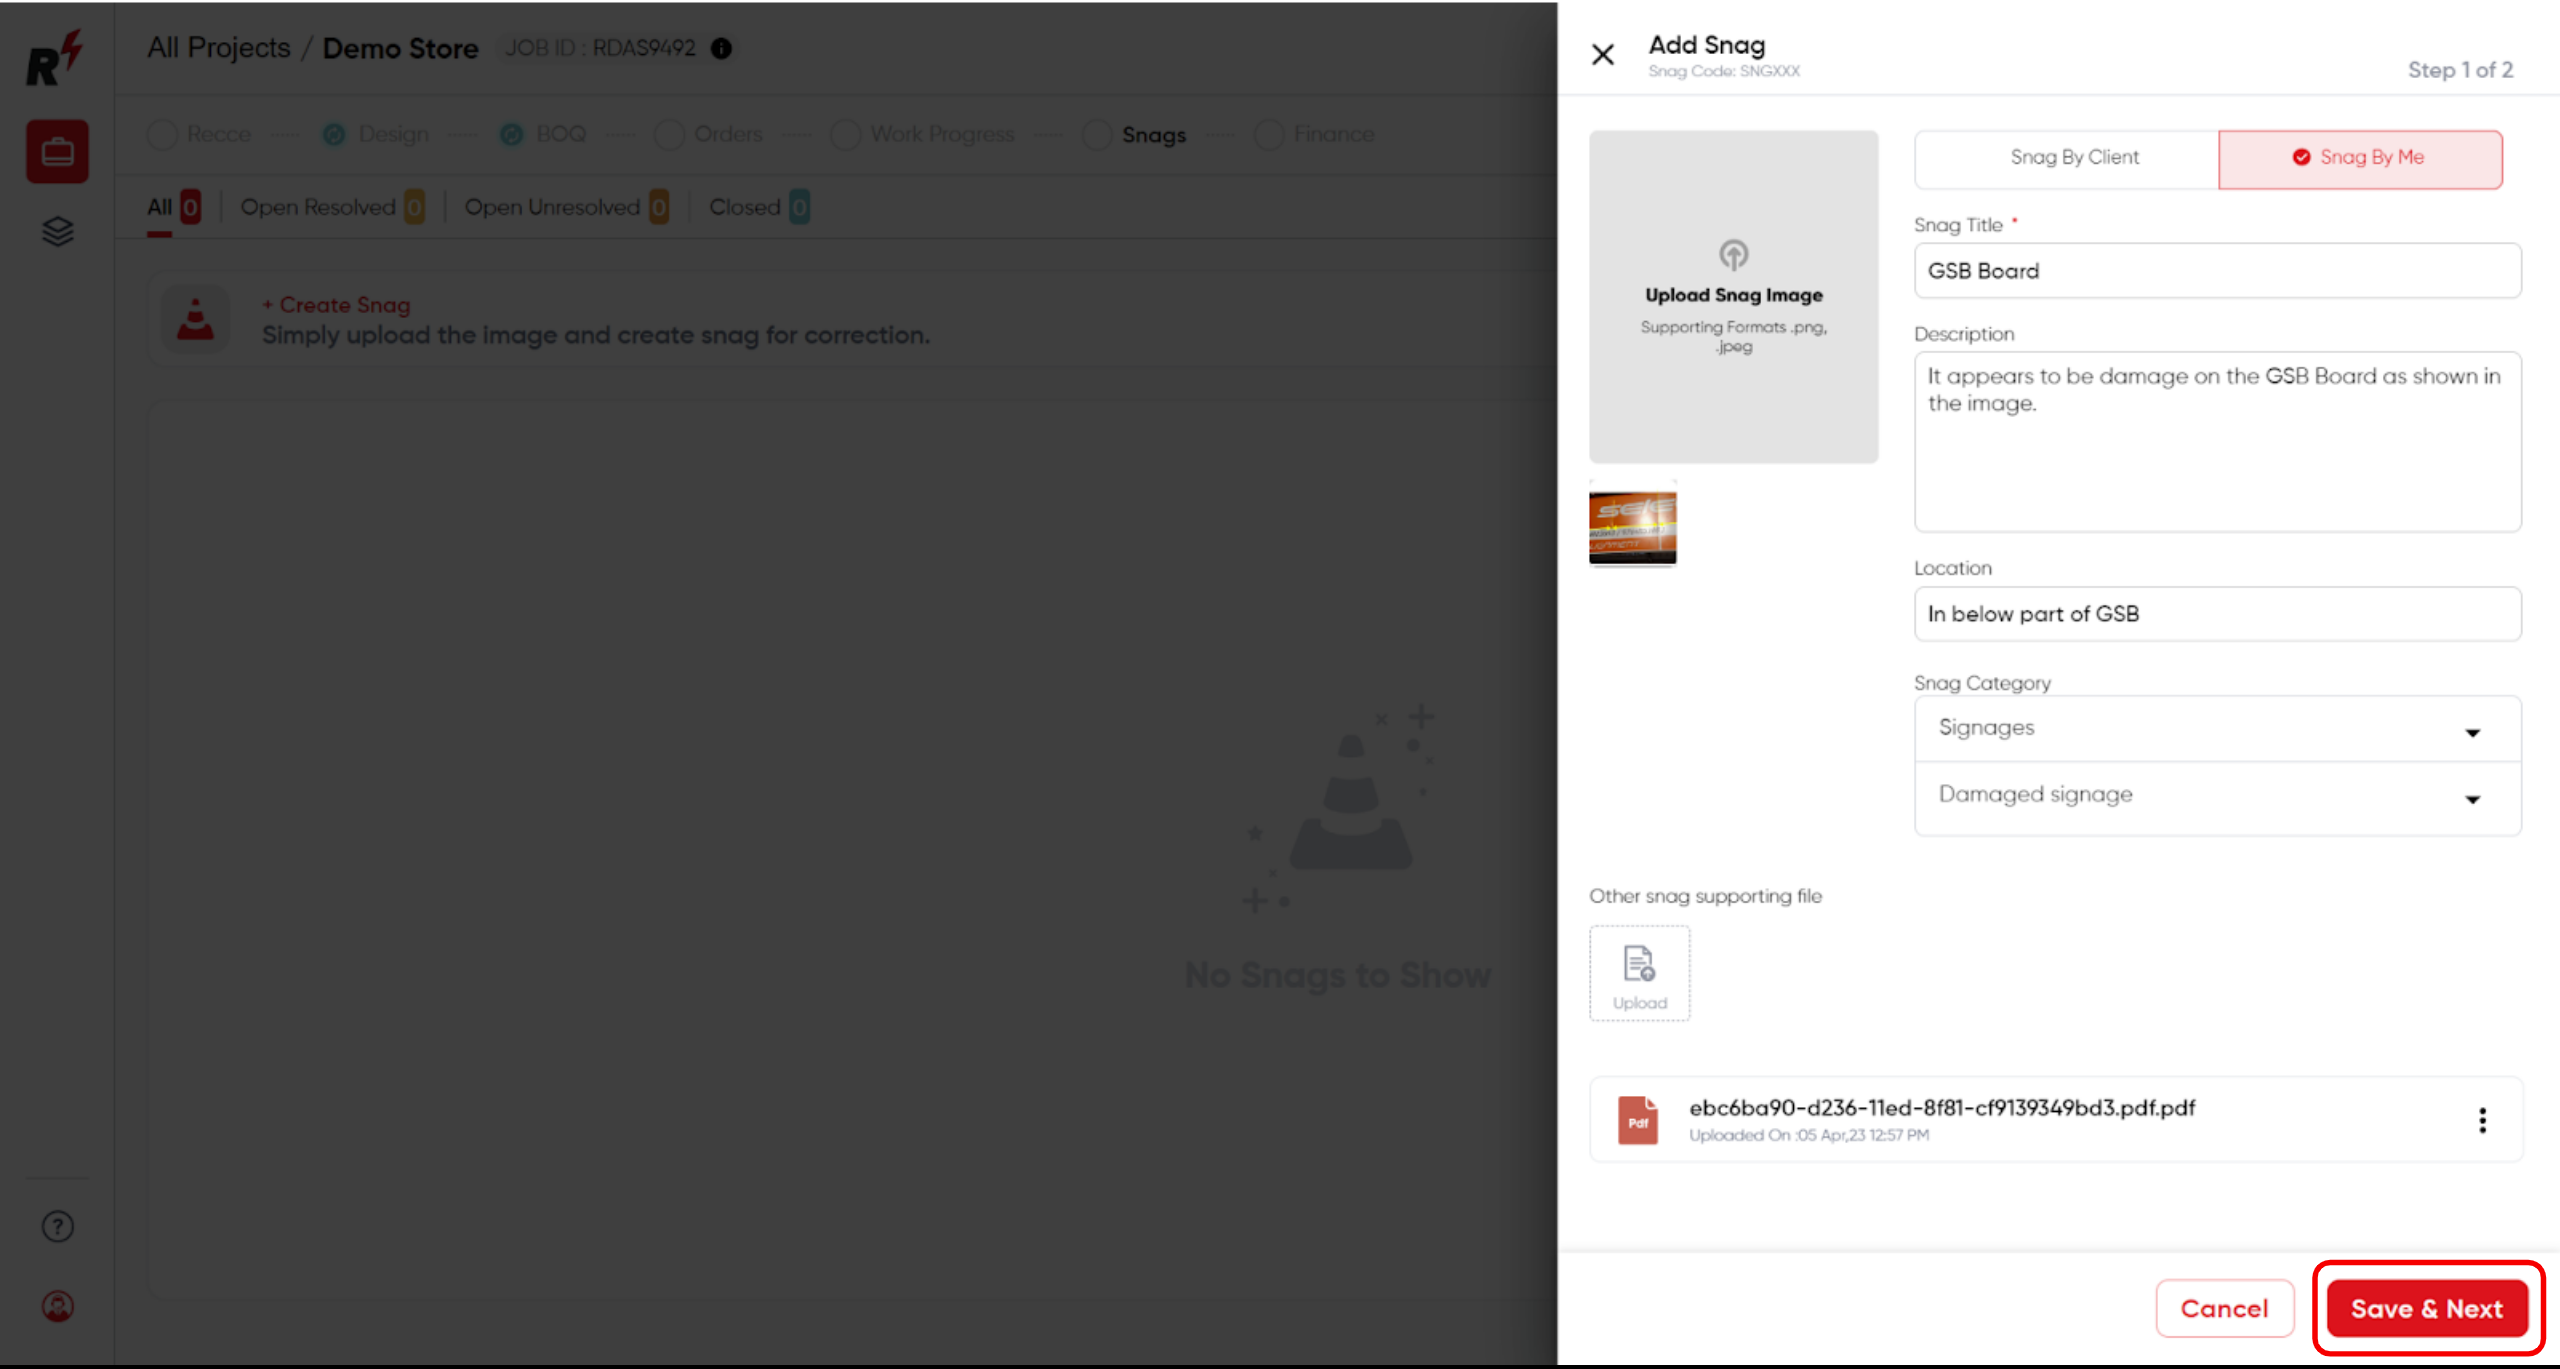
After project selection, navigate to the snag module and click "create snag" to proceed.
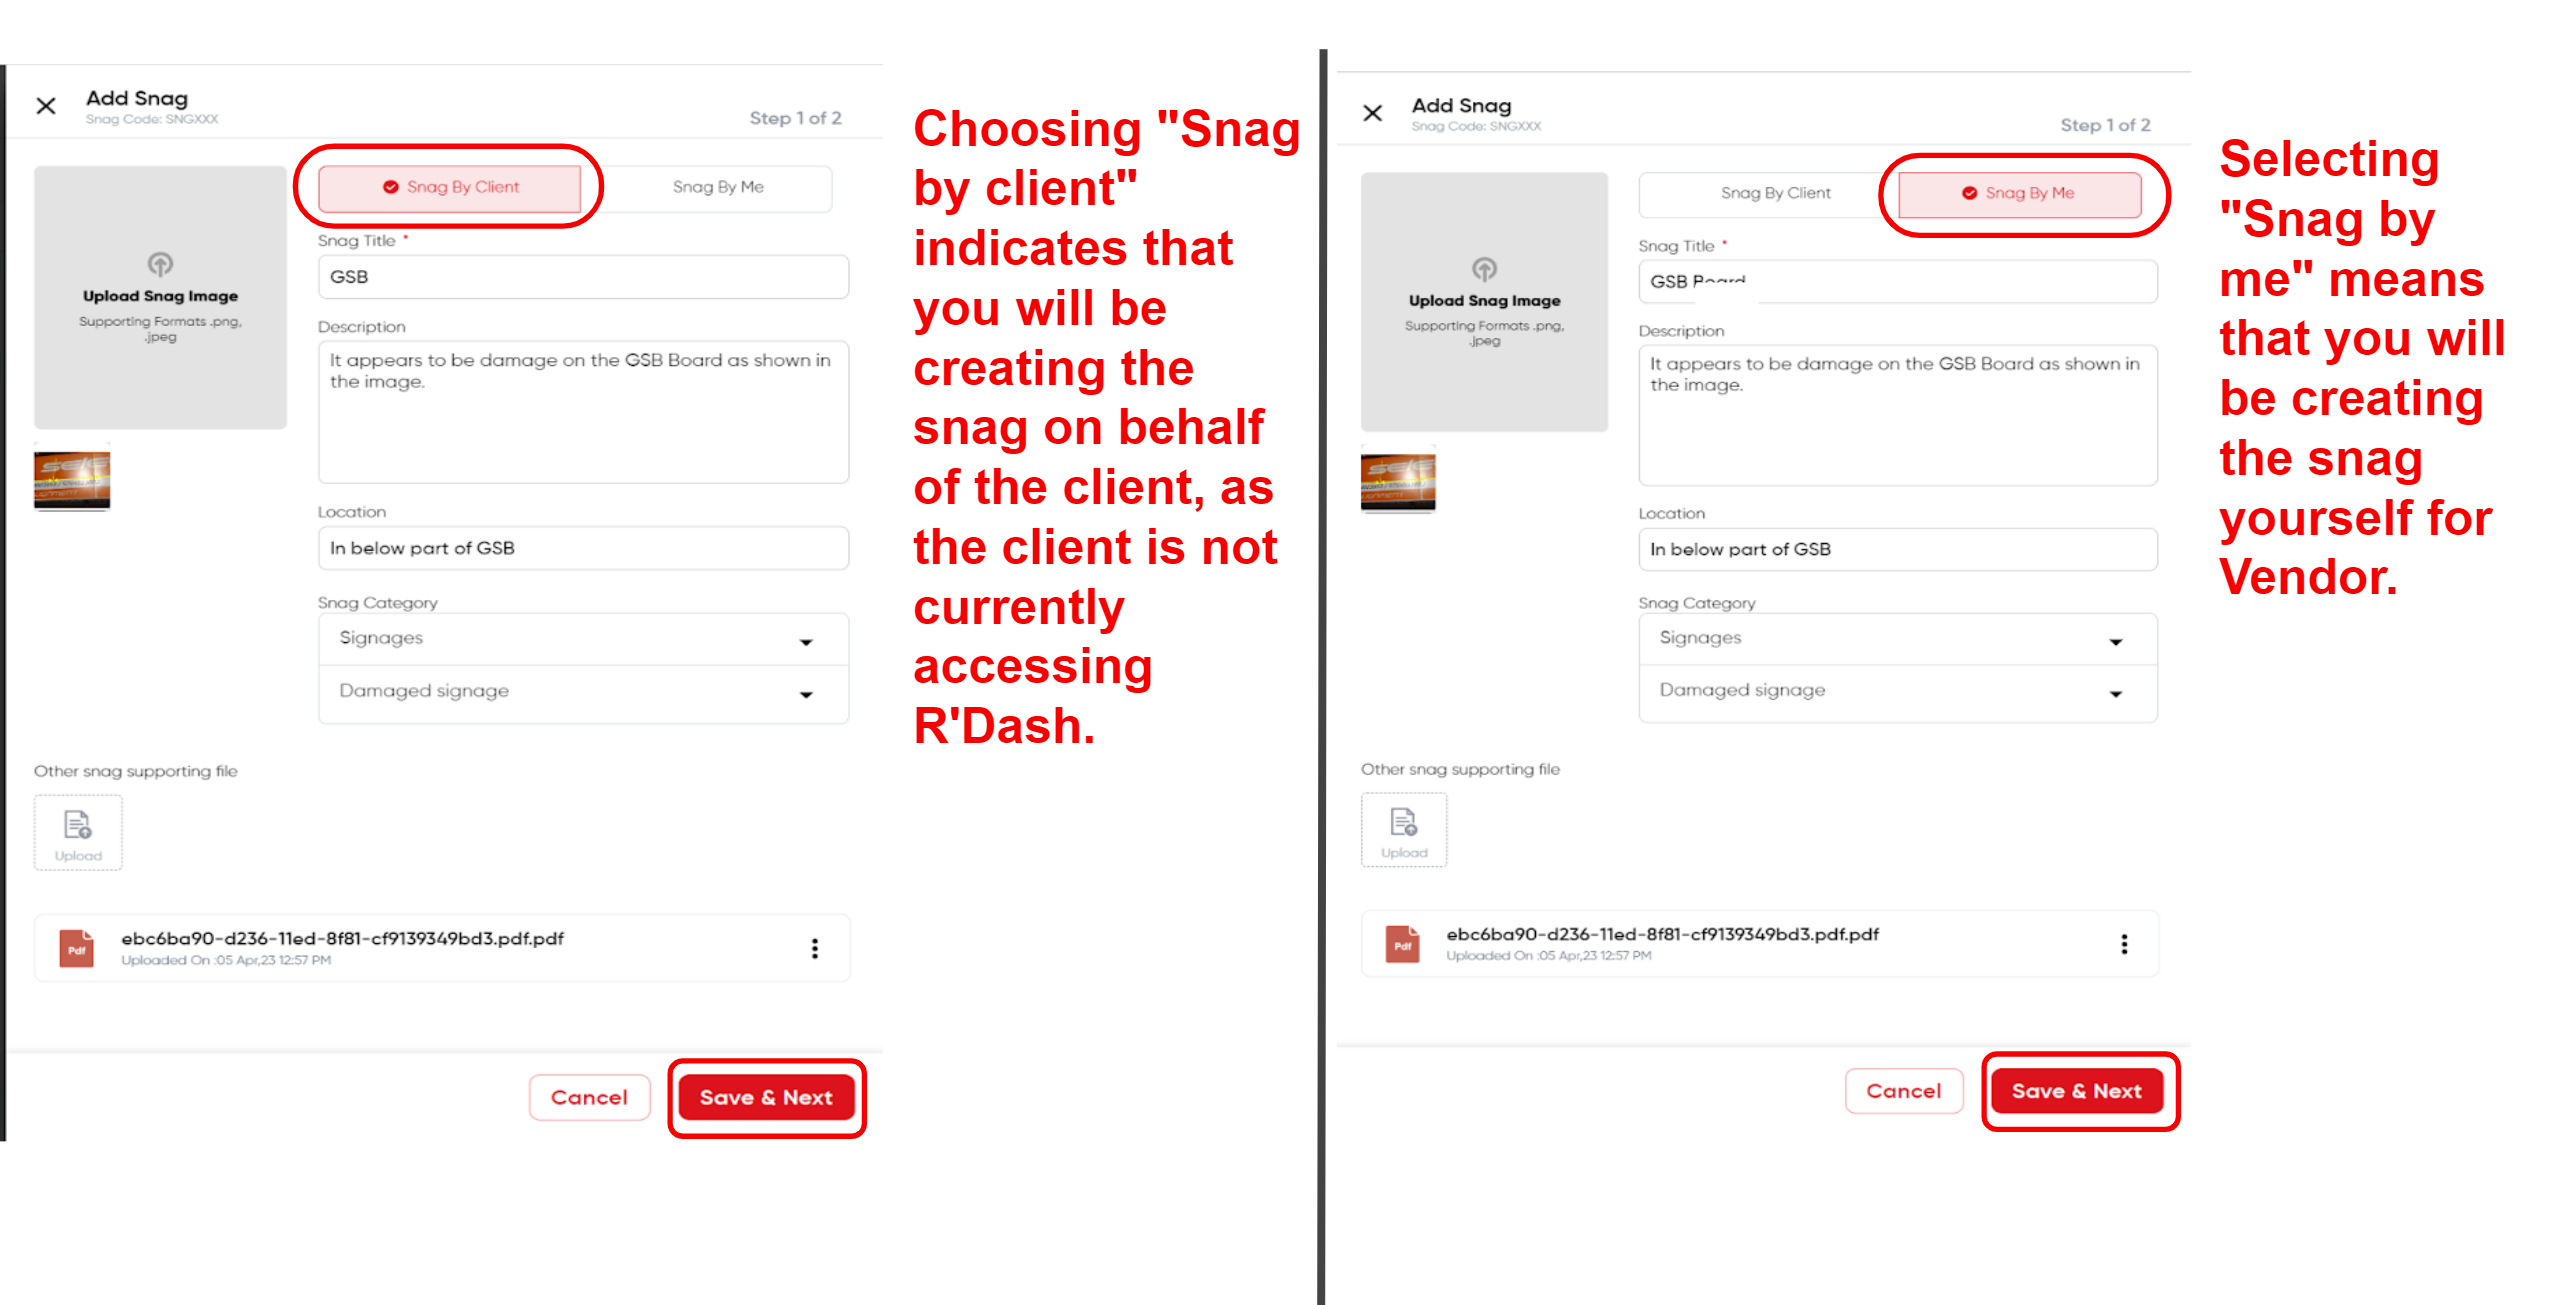
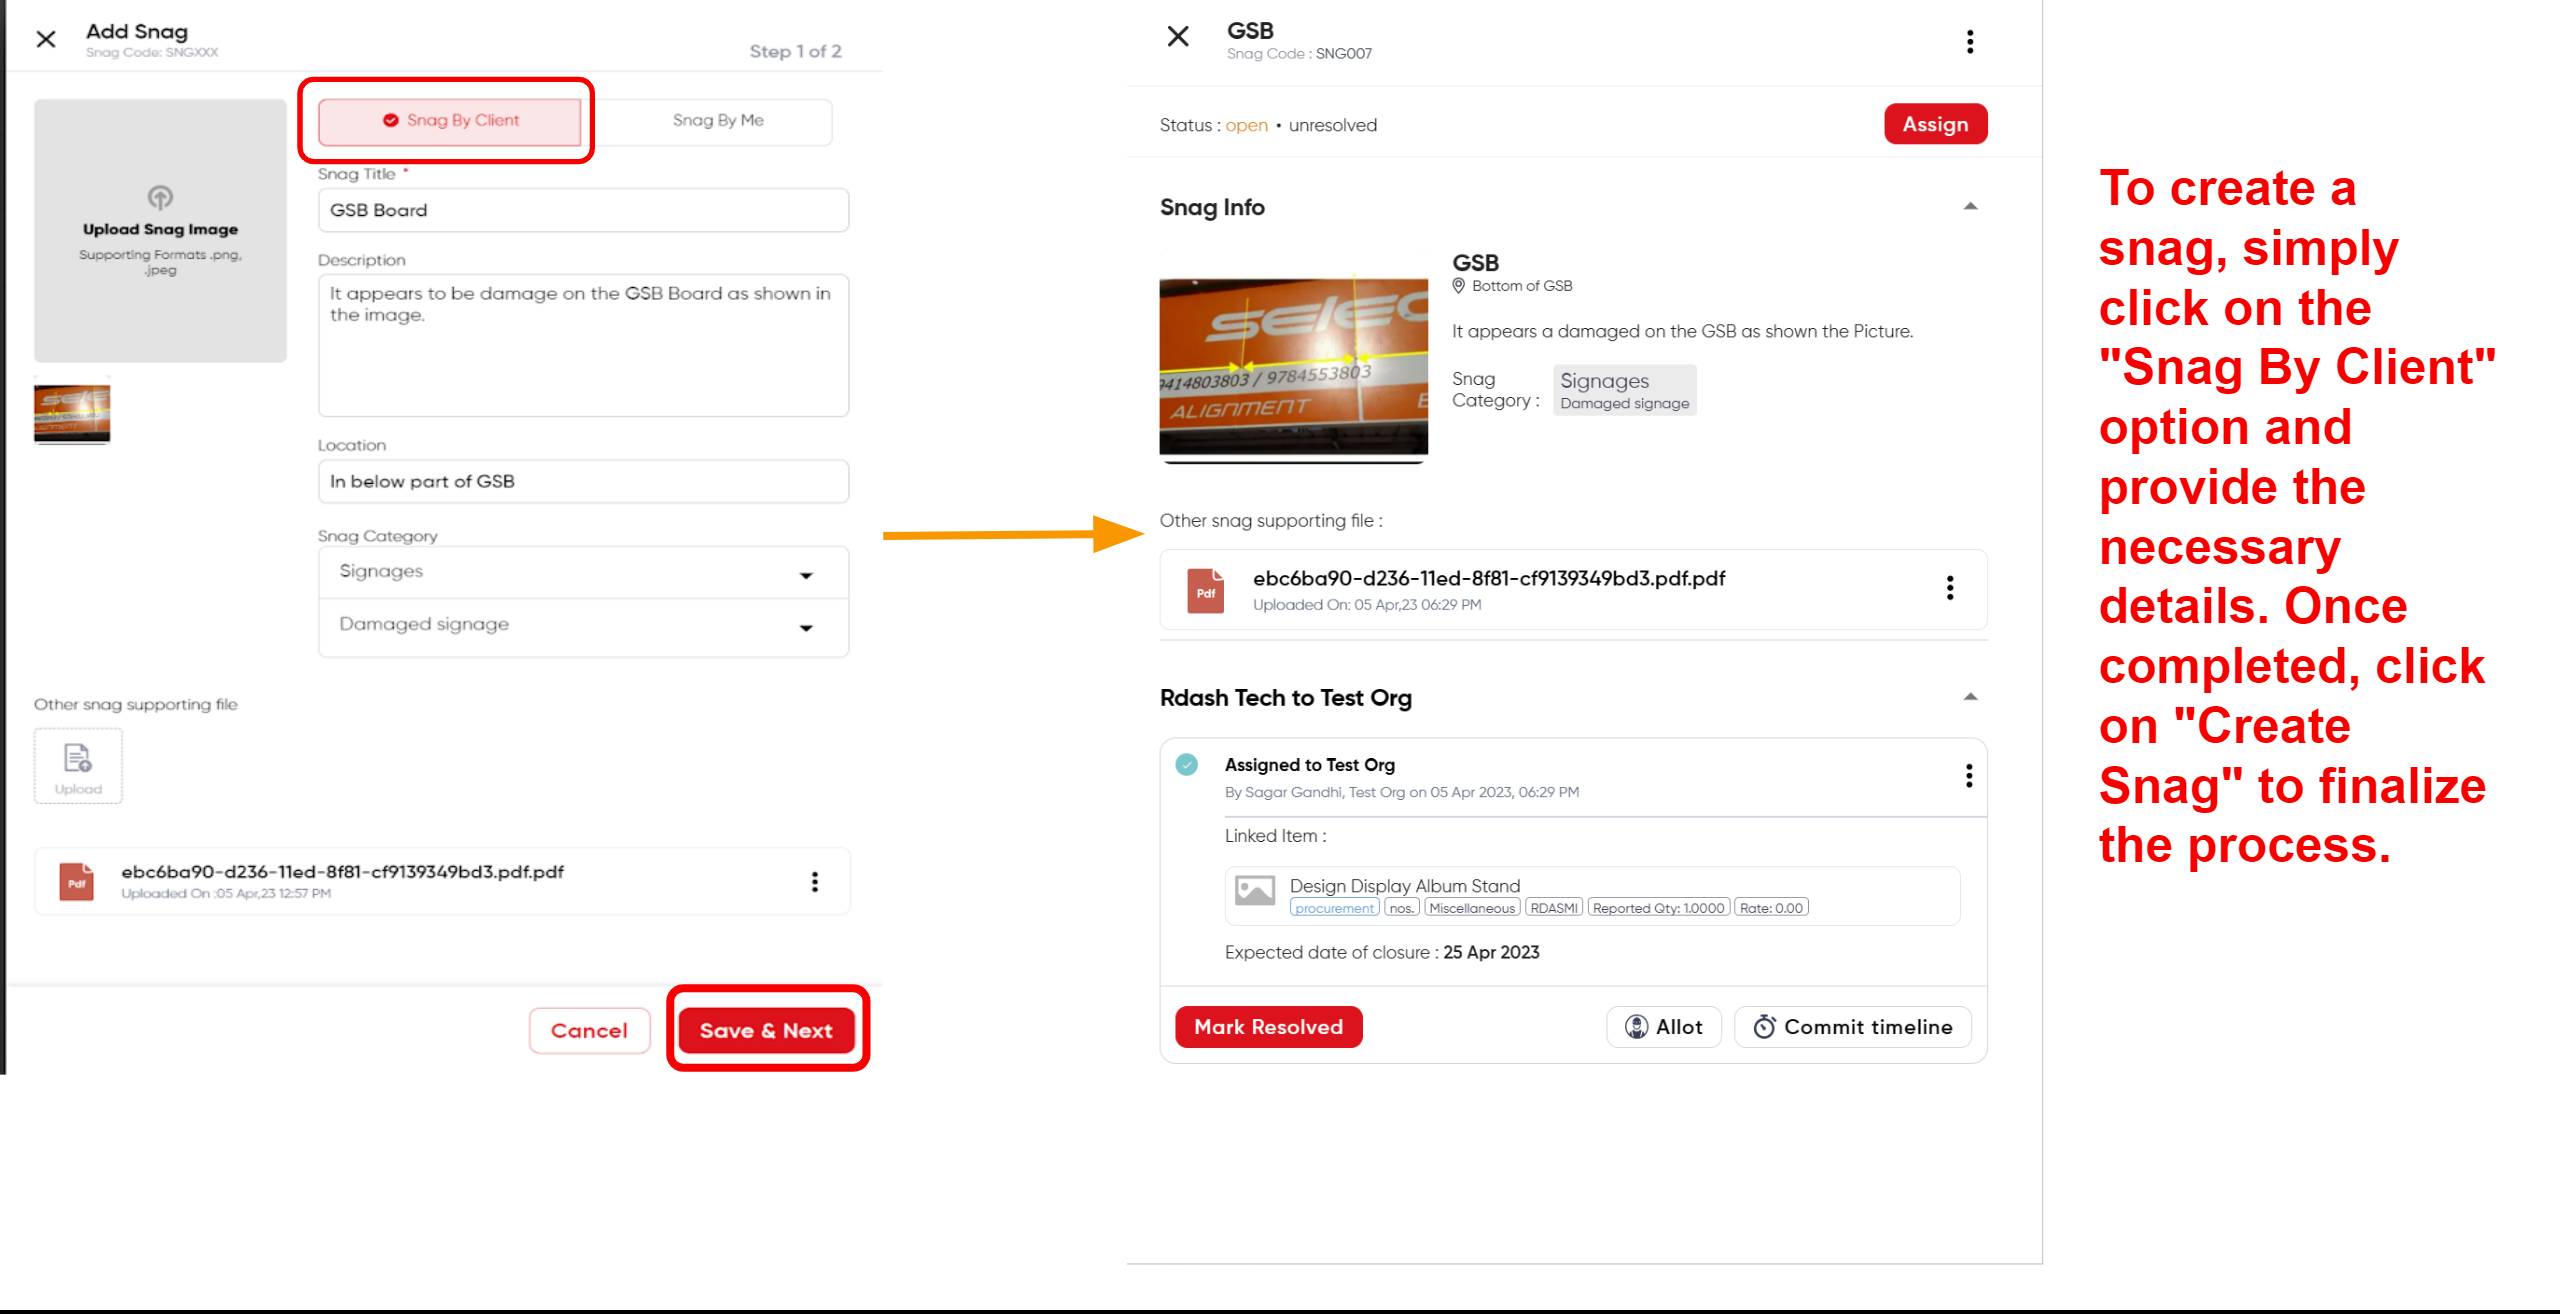
When adding a new snag, you will have two options: "Snag by client" and "Snag by me."
After project selection, navigate to the snag module and click "create snag" to proceed.
You can skip this part by clicking on the Skip button, where you do not want to assign this snag.
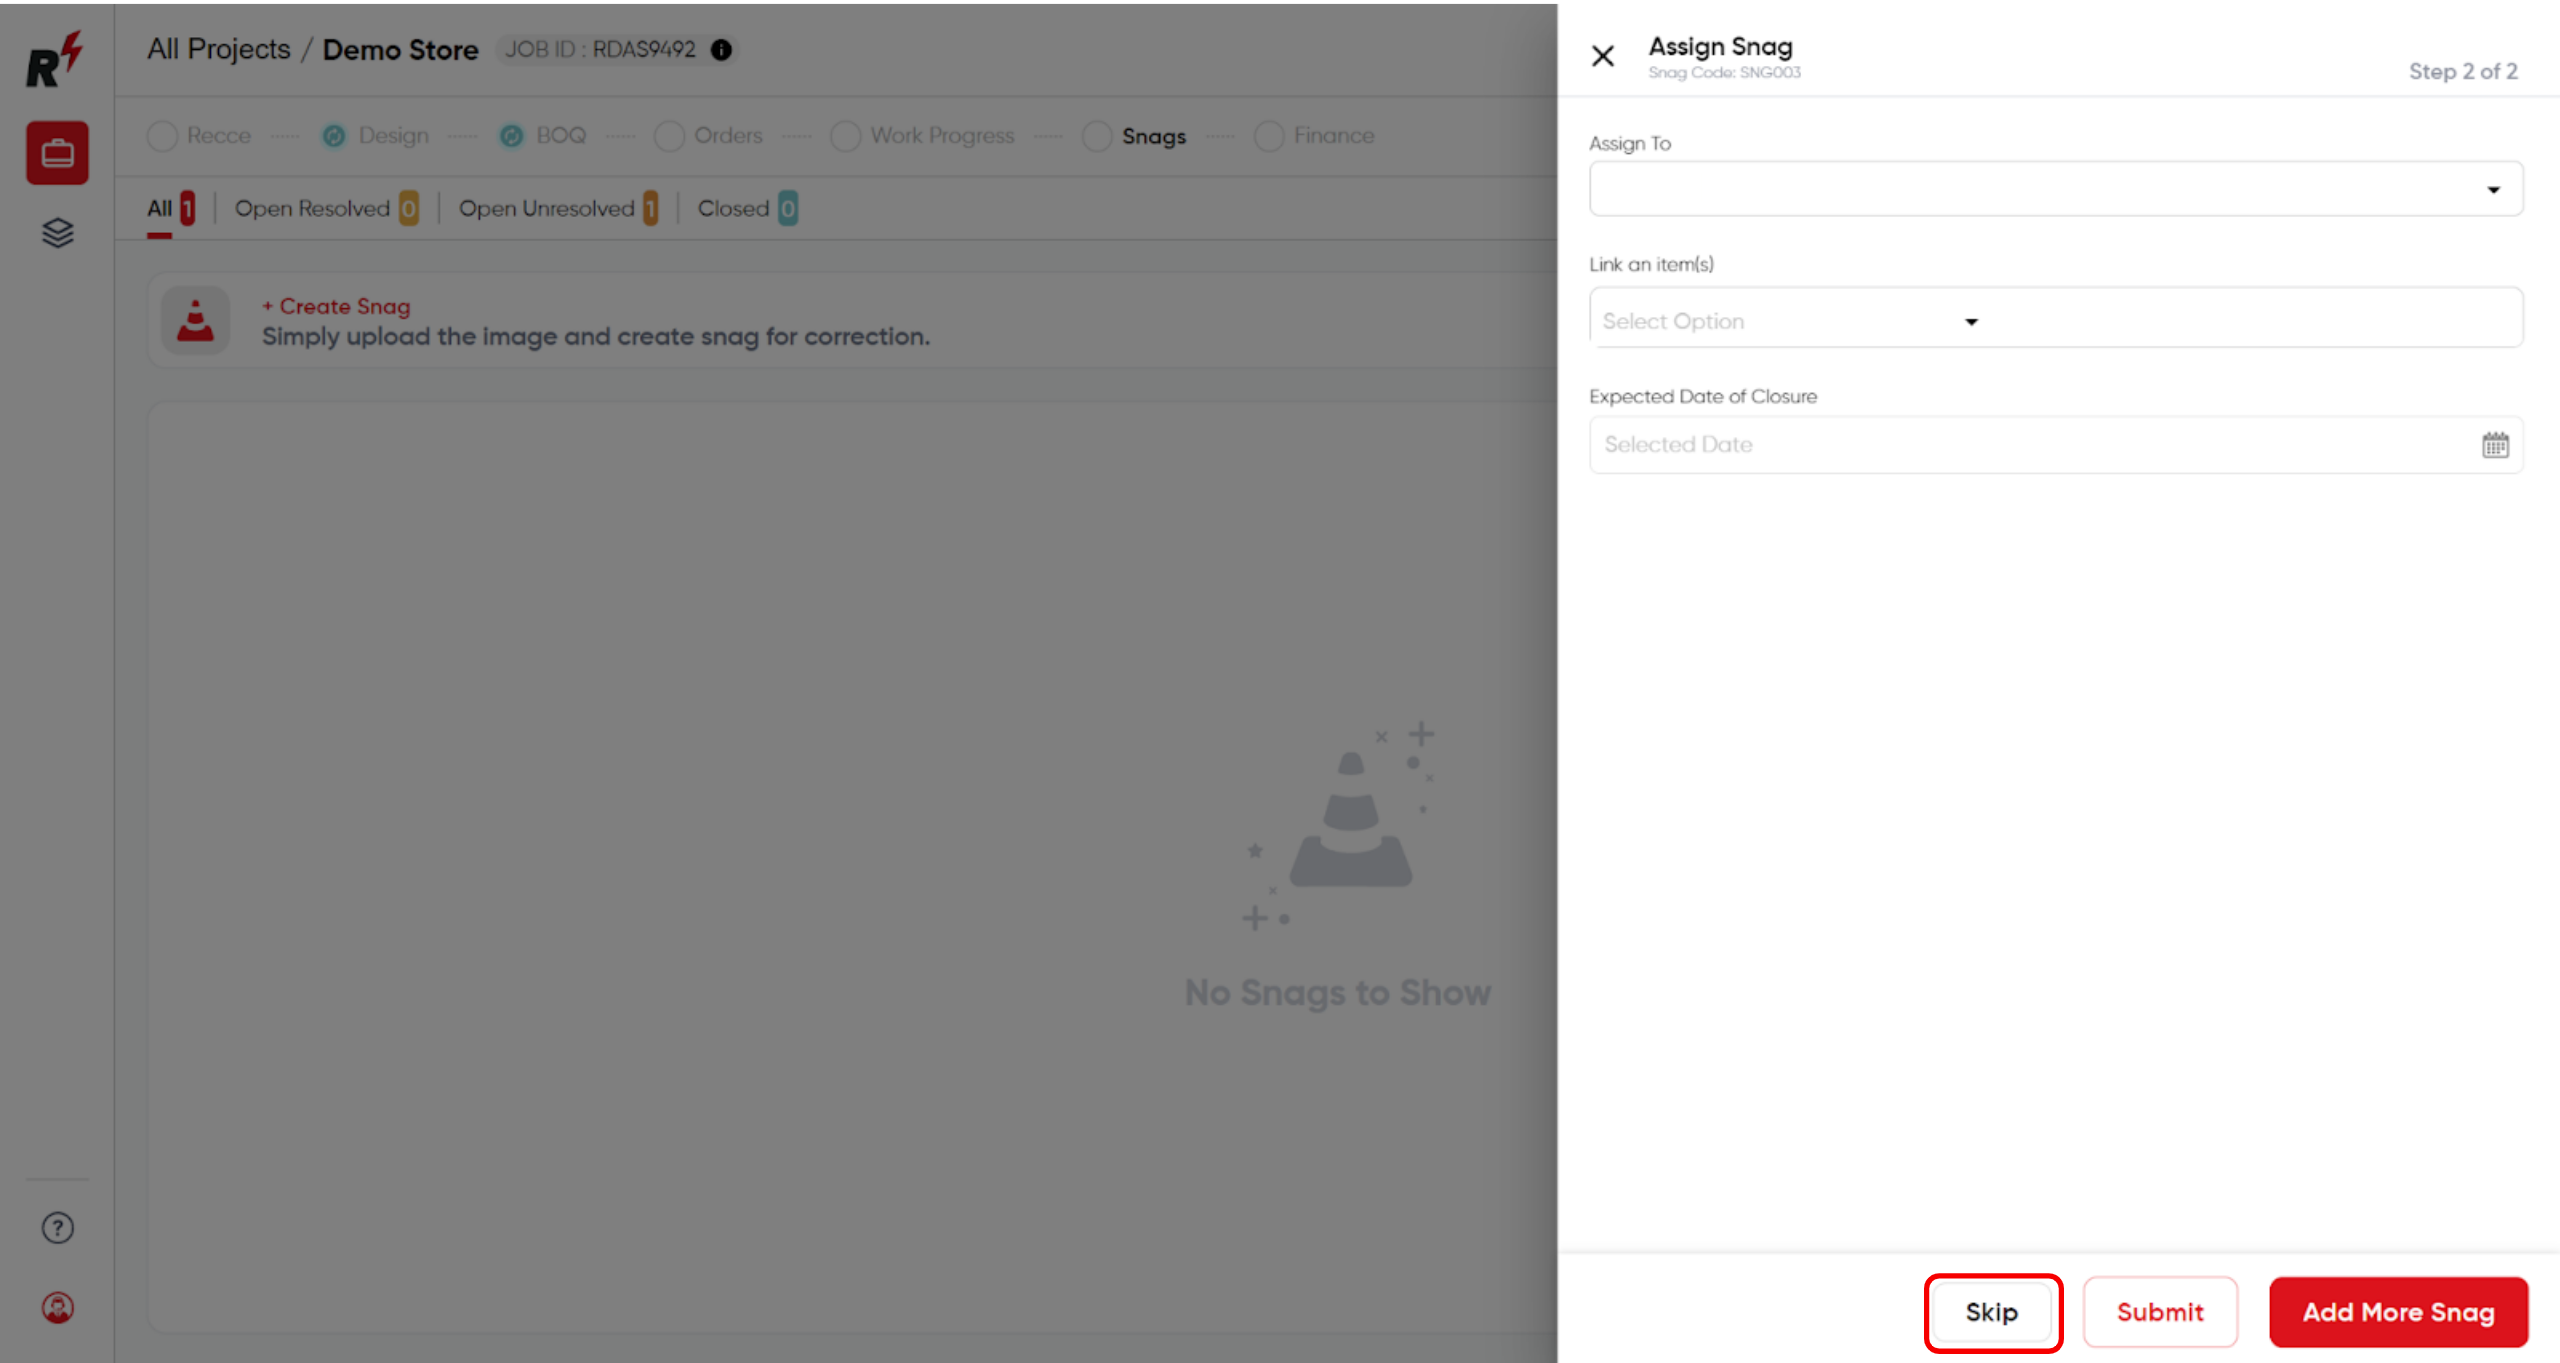
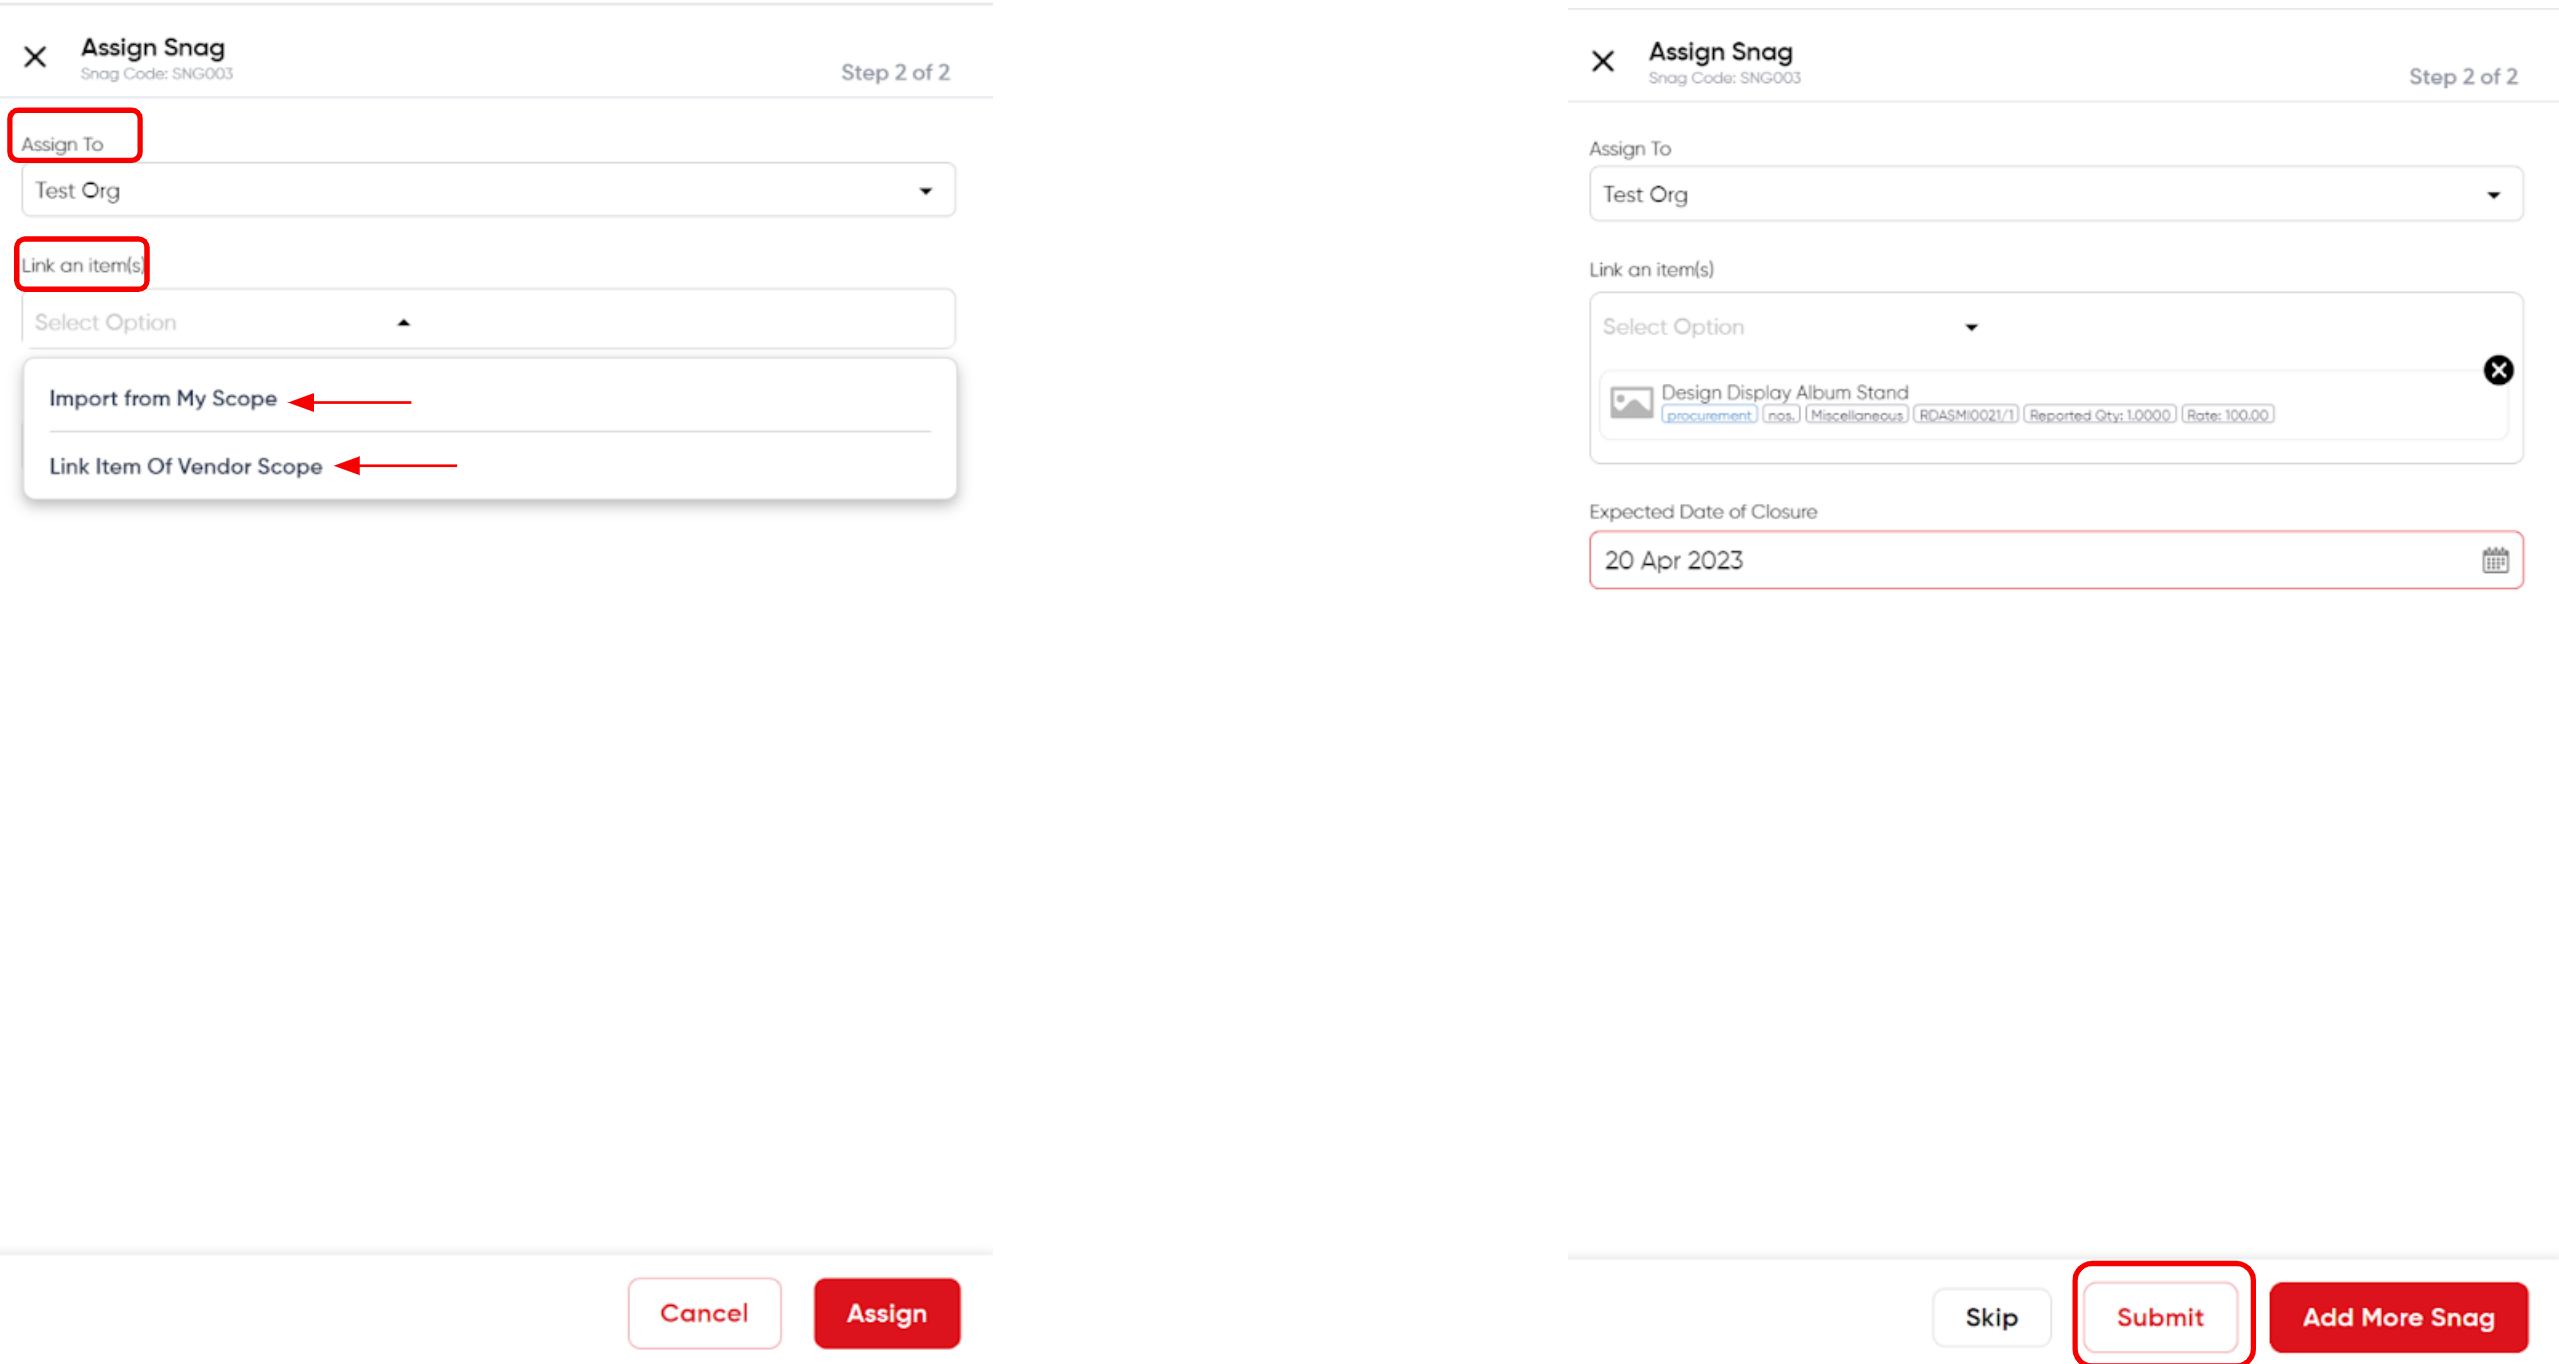
Assign the snag to the organization and link relevant elements. Enter the expected date of Closure.
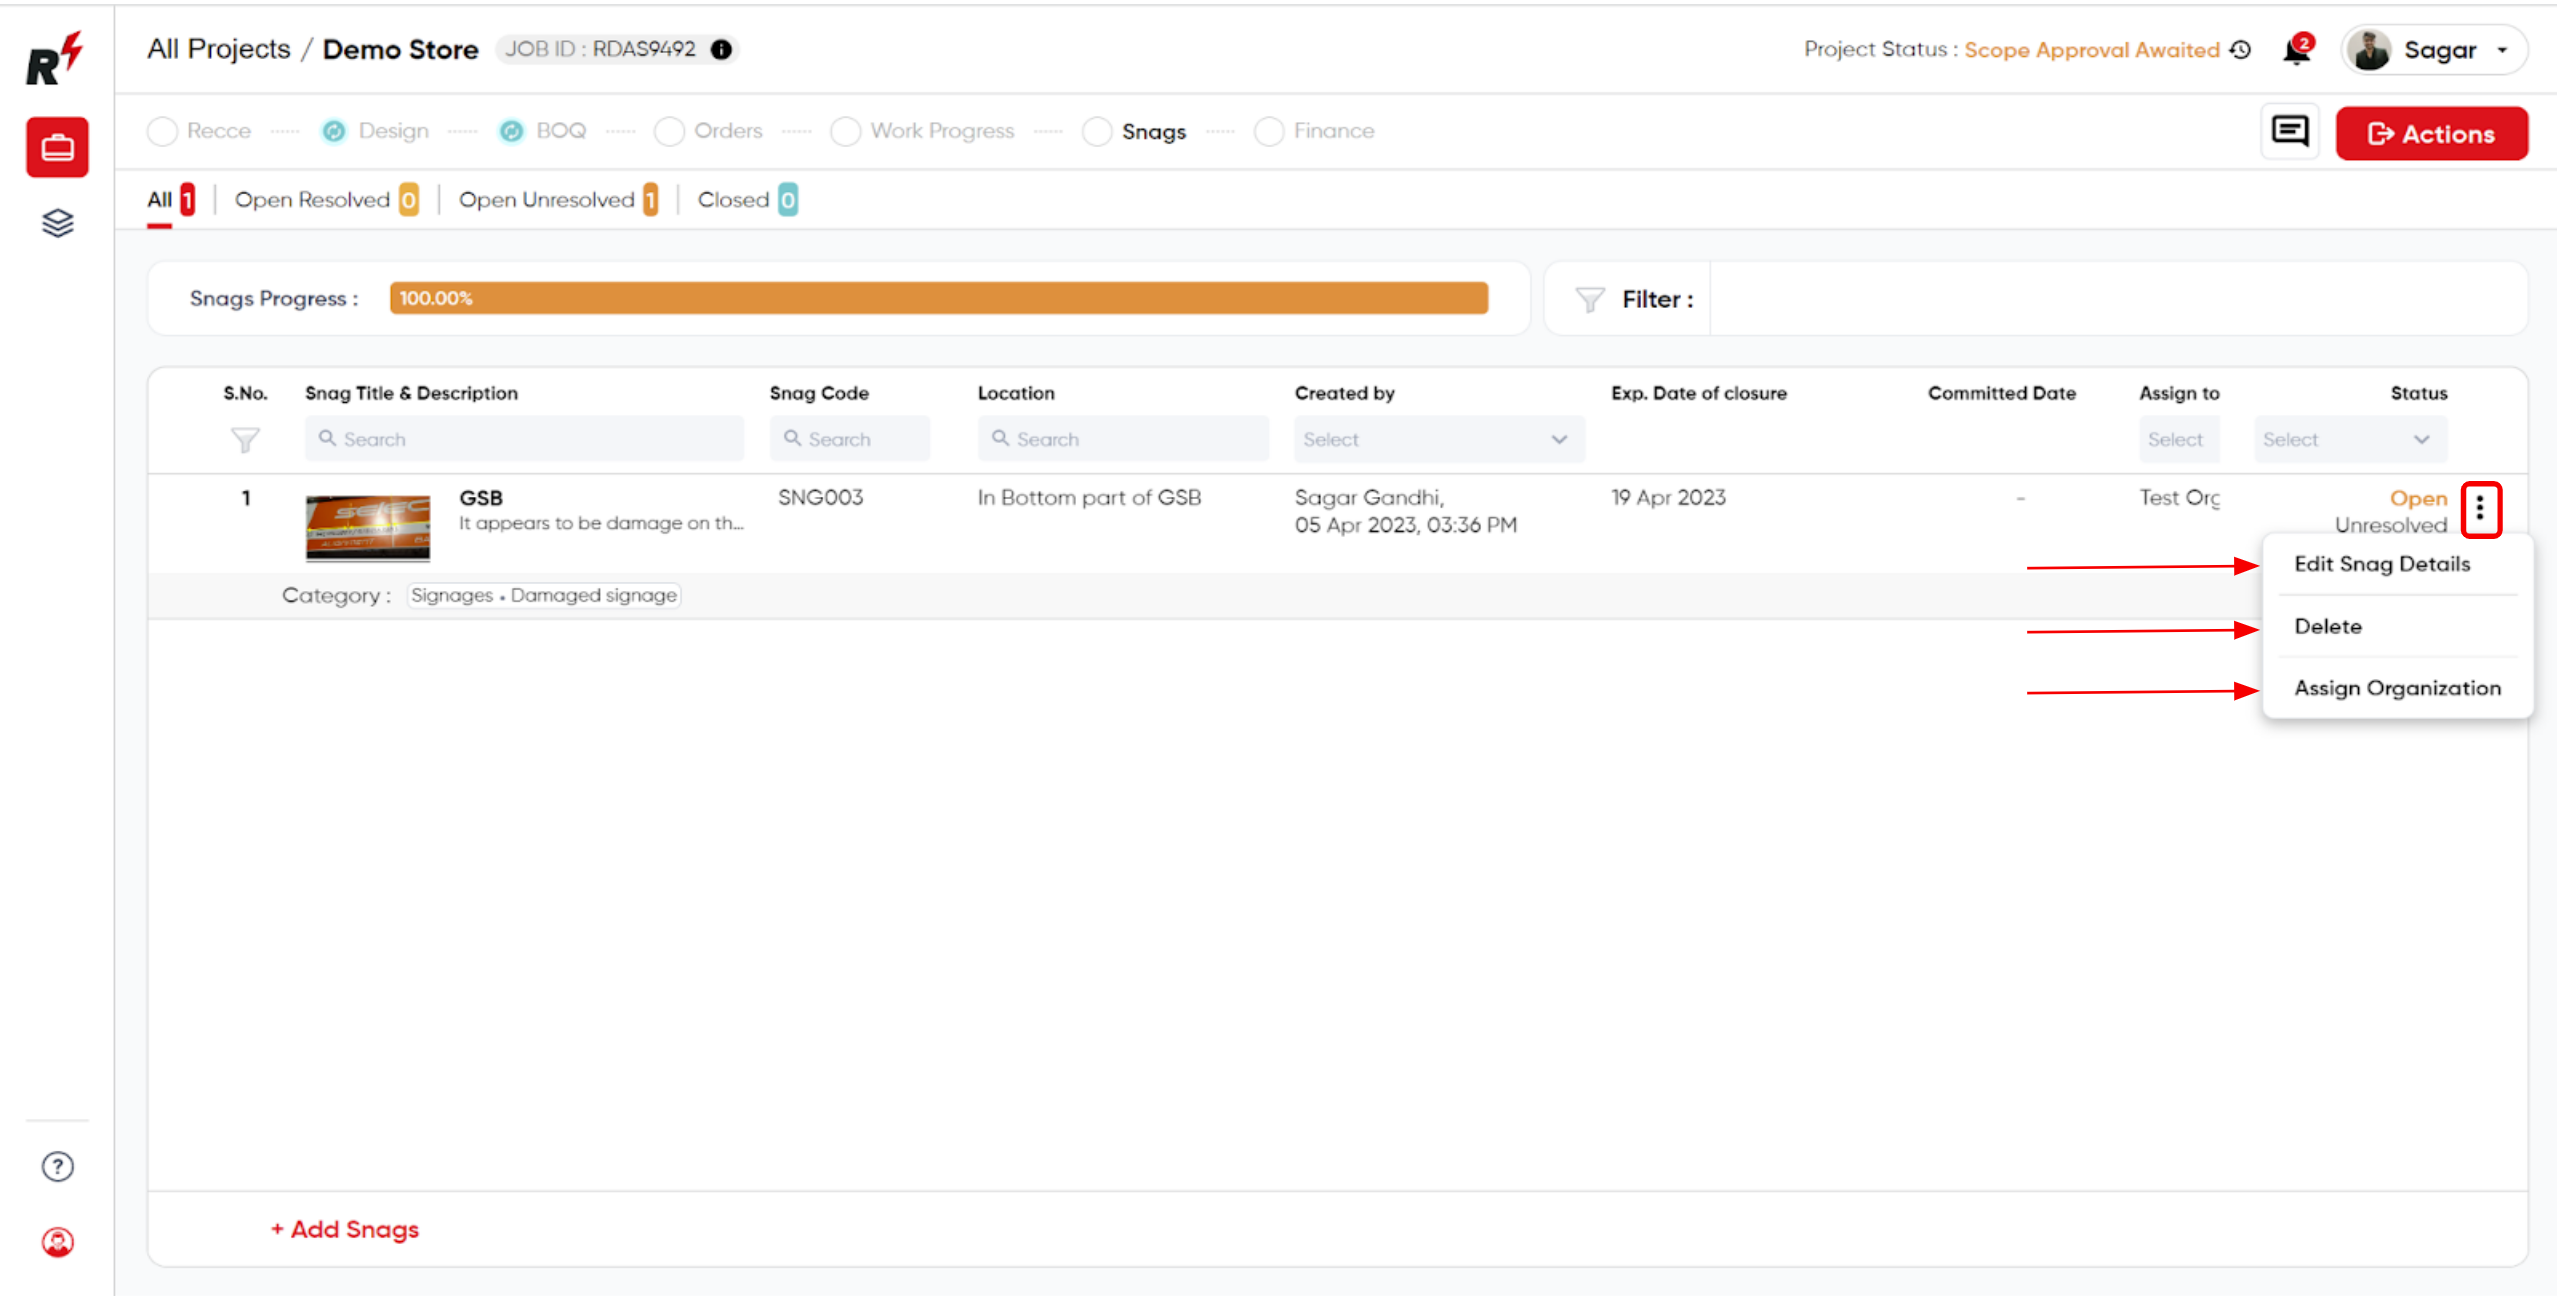
To manage a snag, click the three dots icon next to it to access options such as editing, deleting, and assigning an organization. And also it will automatically generate the Snag Code.
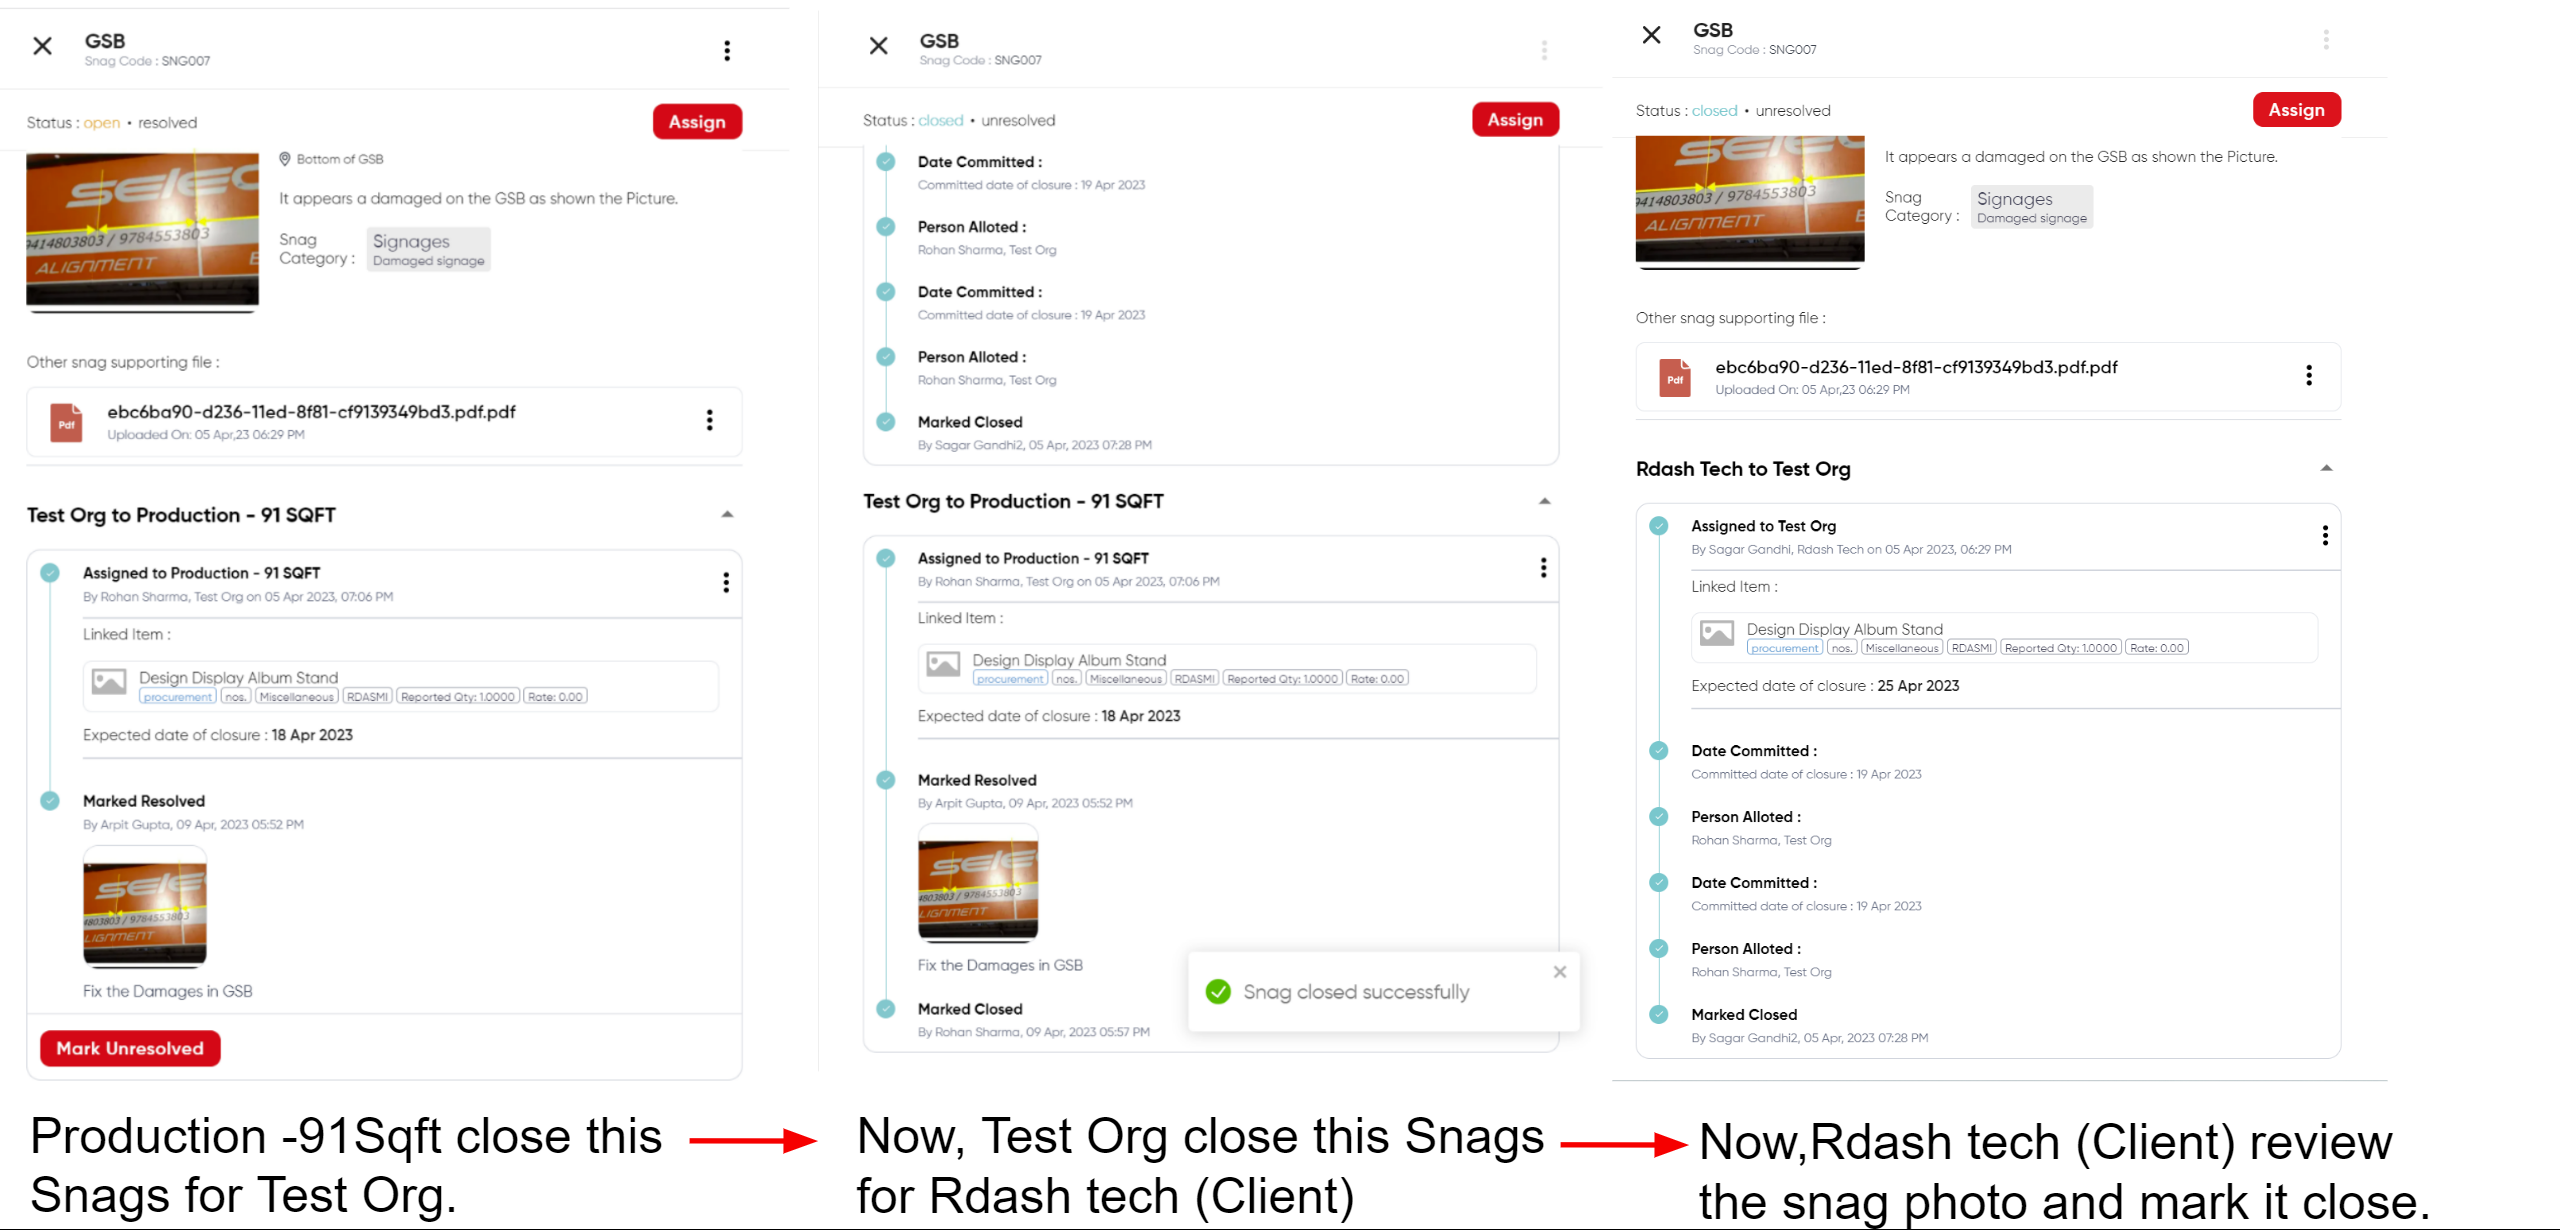
The assigned vendor can access the project on their R'Dash and mark the snag as resolved by clicking the corresponding button within the snag details.

After clicking "Mark Resolved," the vendor must upload a completed photo and provide remarks. Alternatively, they can choose the "Snag Not Applicable" option.
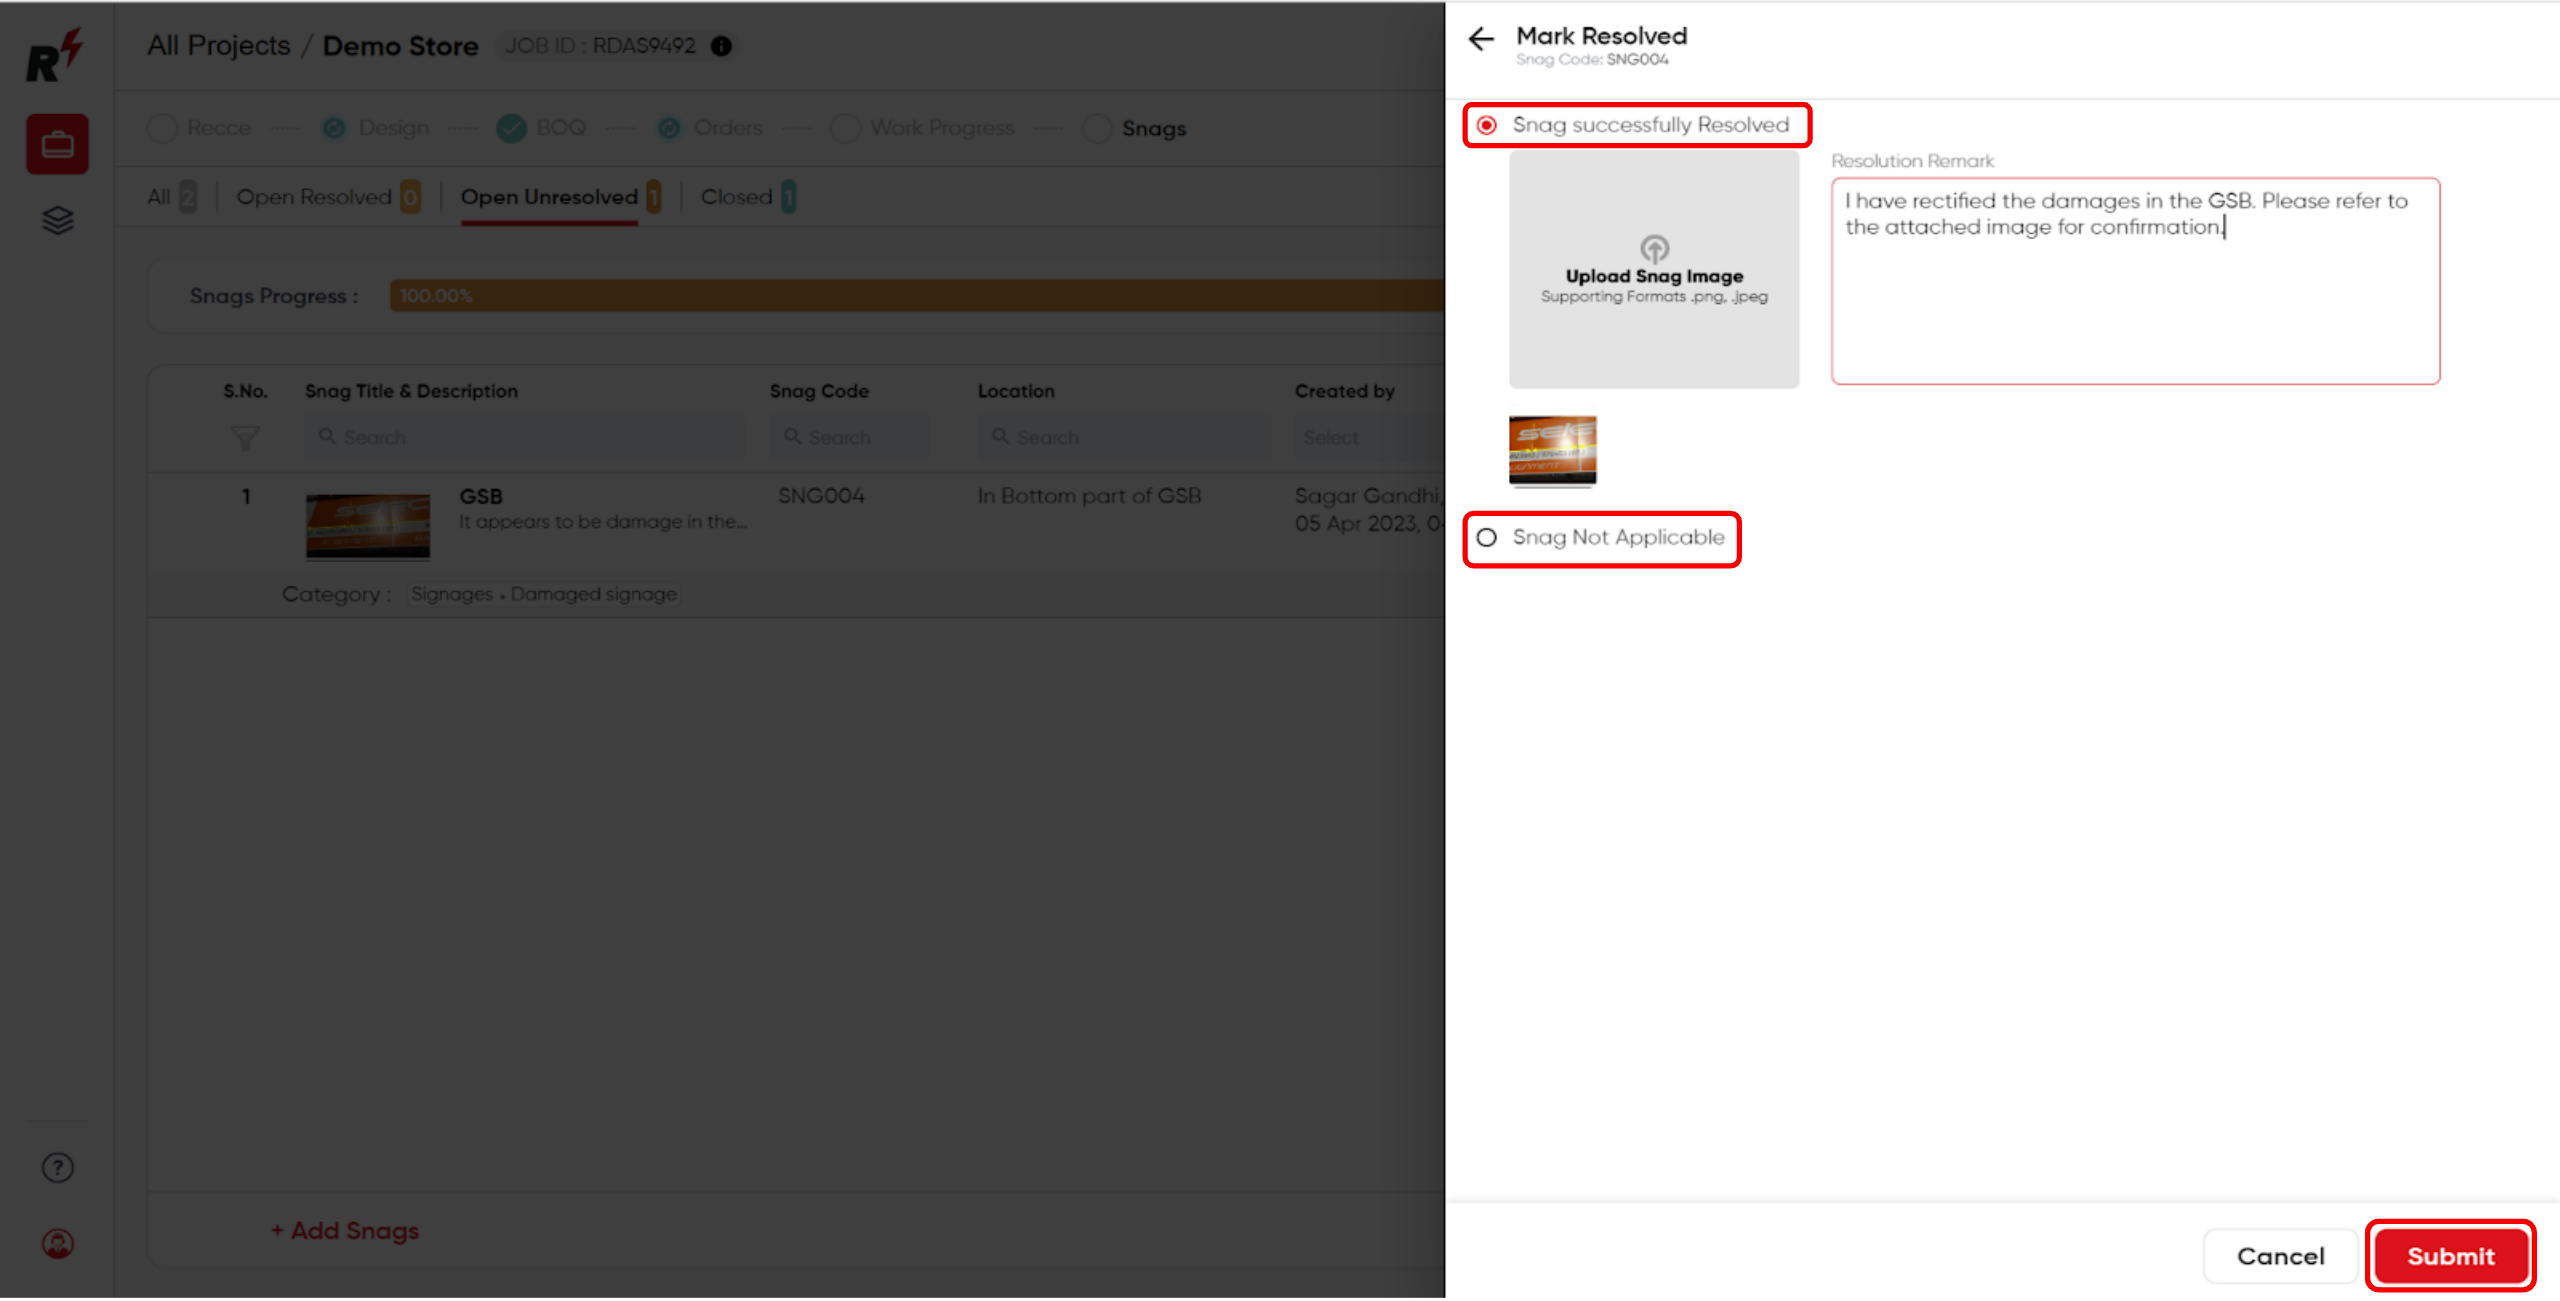
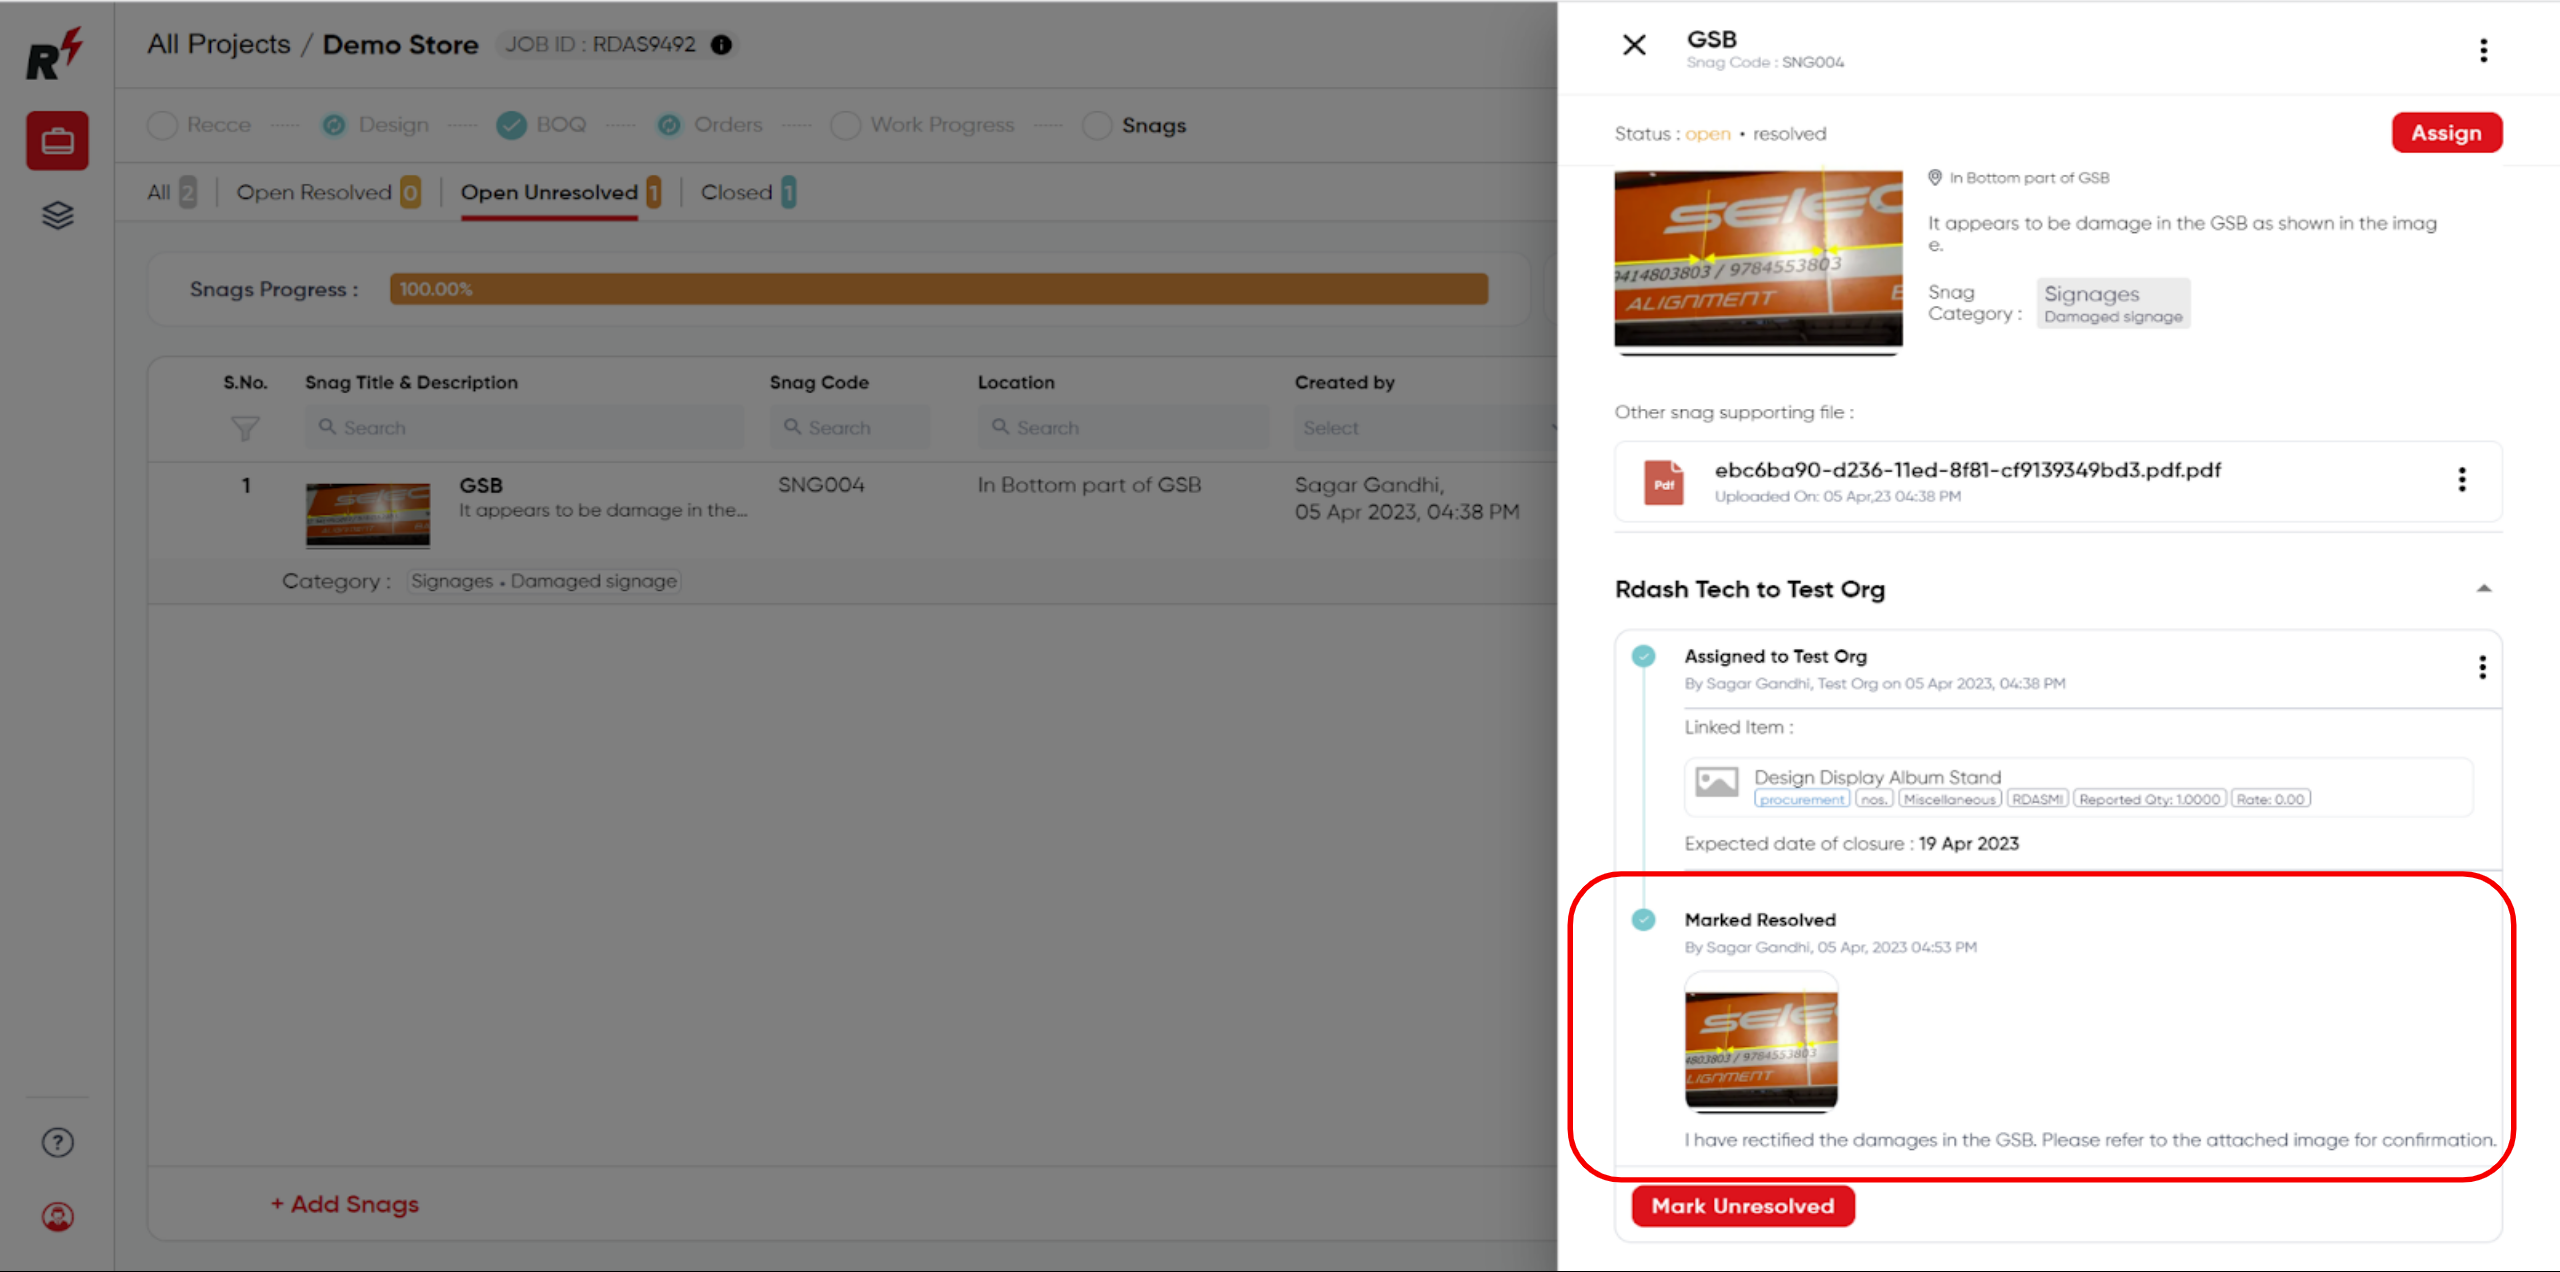
Upon clicking the "Submit," button you can verify that the assigned snag is now marked as resolved and view the uploaded photos and timestamp.
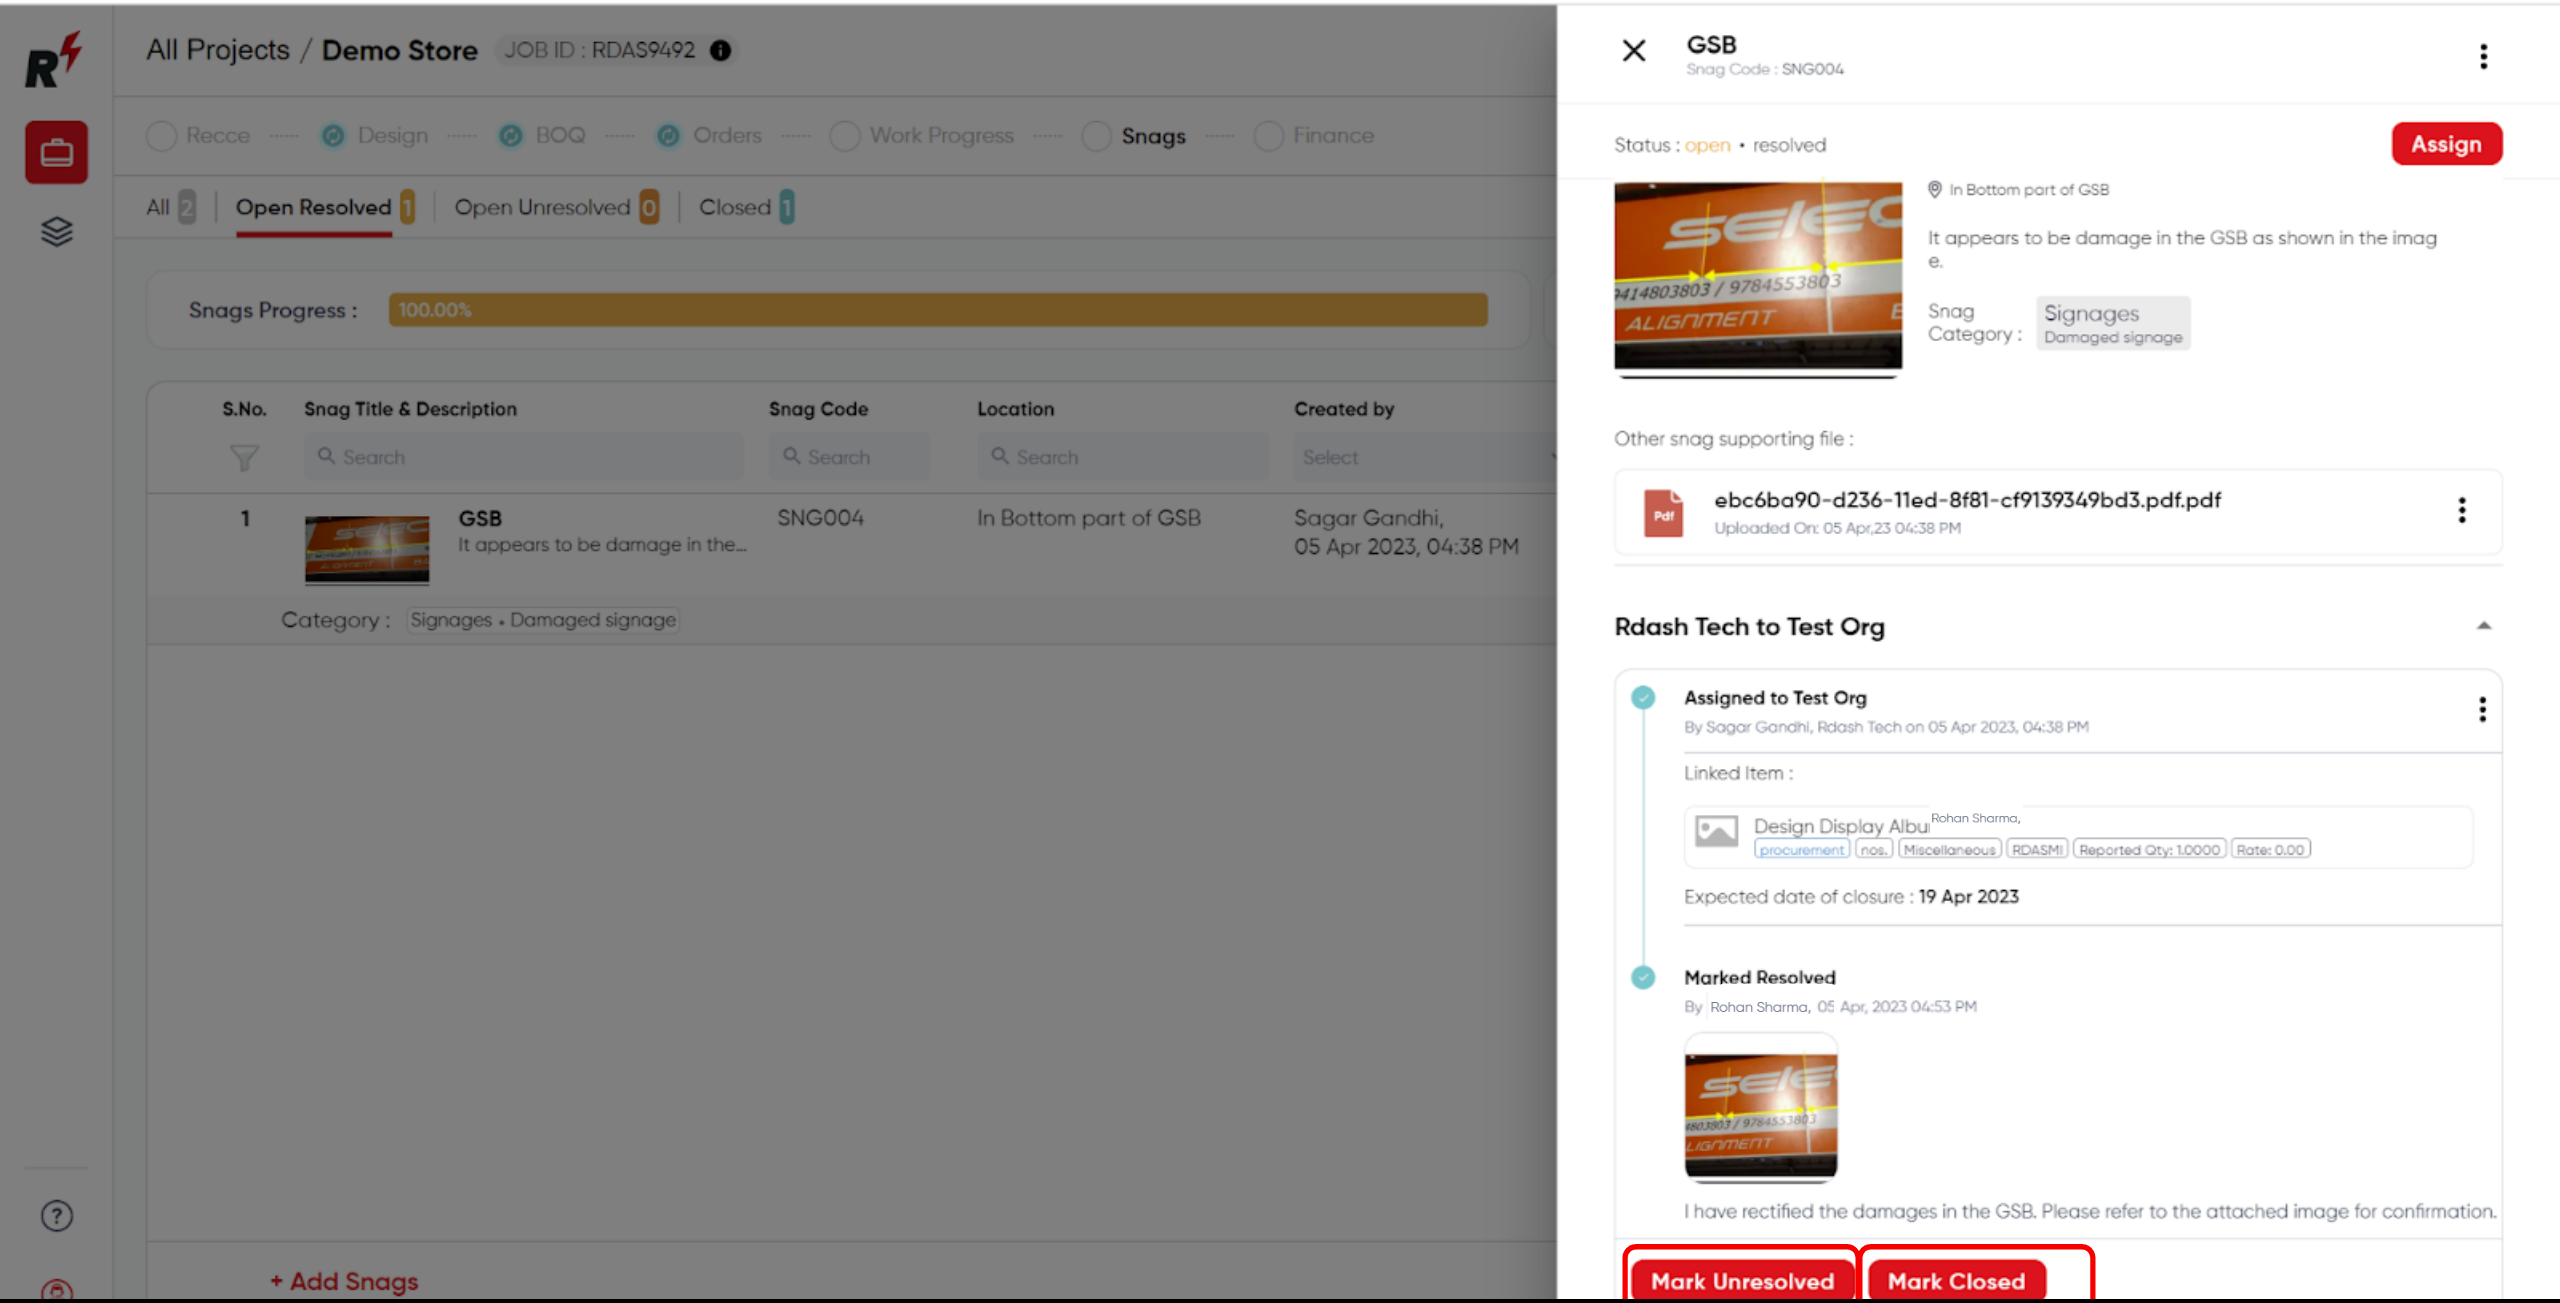
After reviewing the completed photo, you can either mark the snag as closed or revert it back to an unresolved status.
Now we see the case where we create the Snag on behalf of the Client.
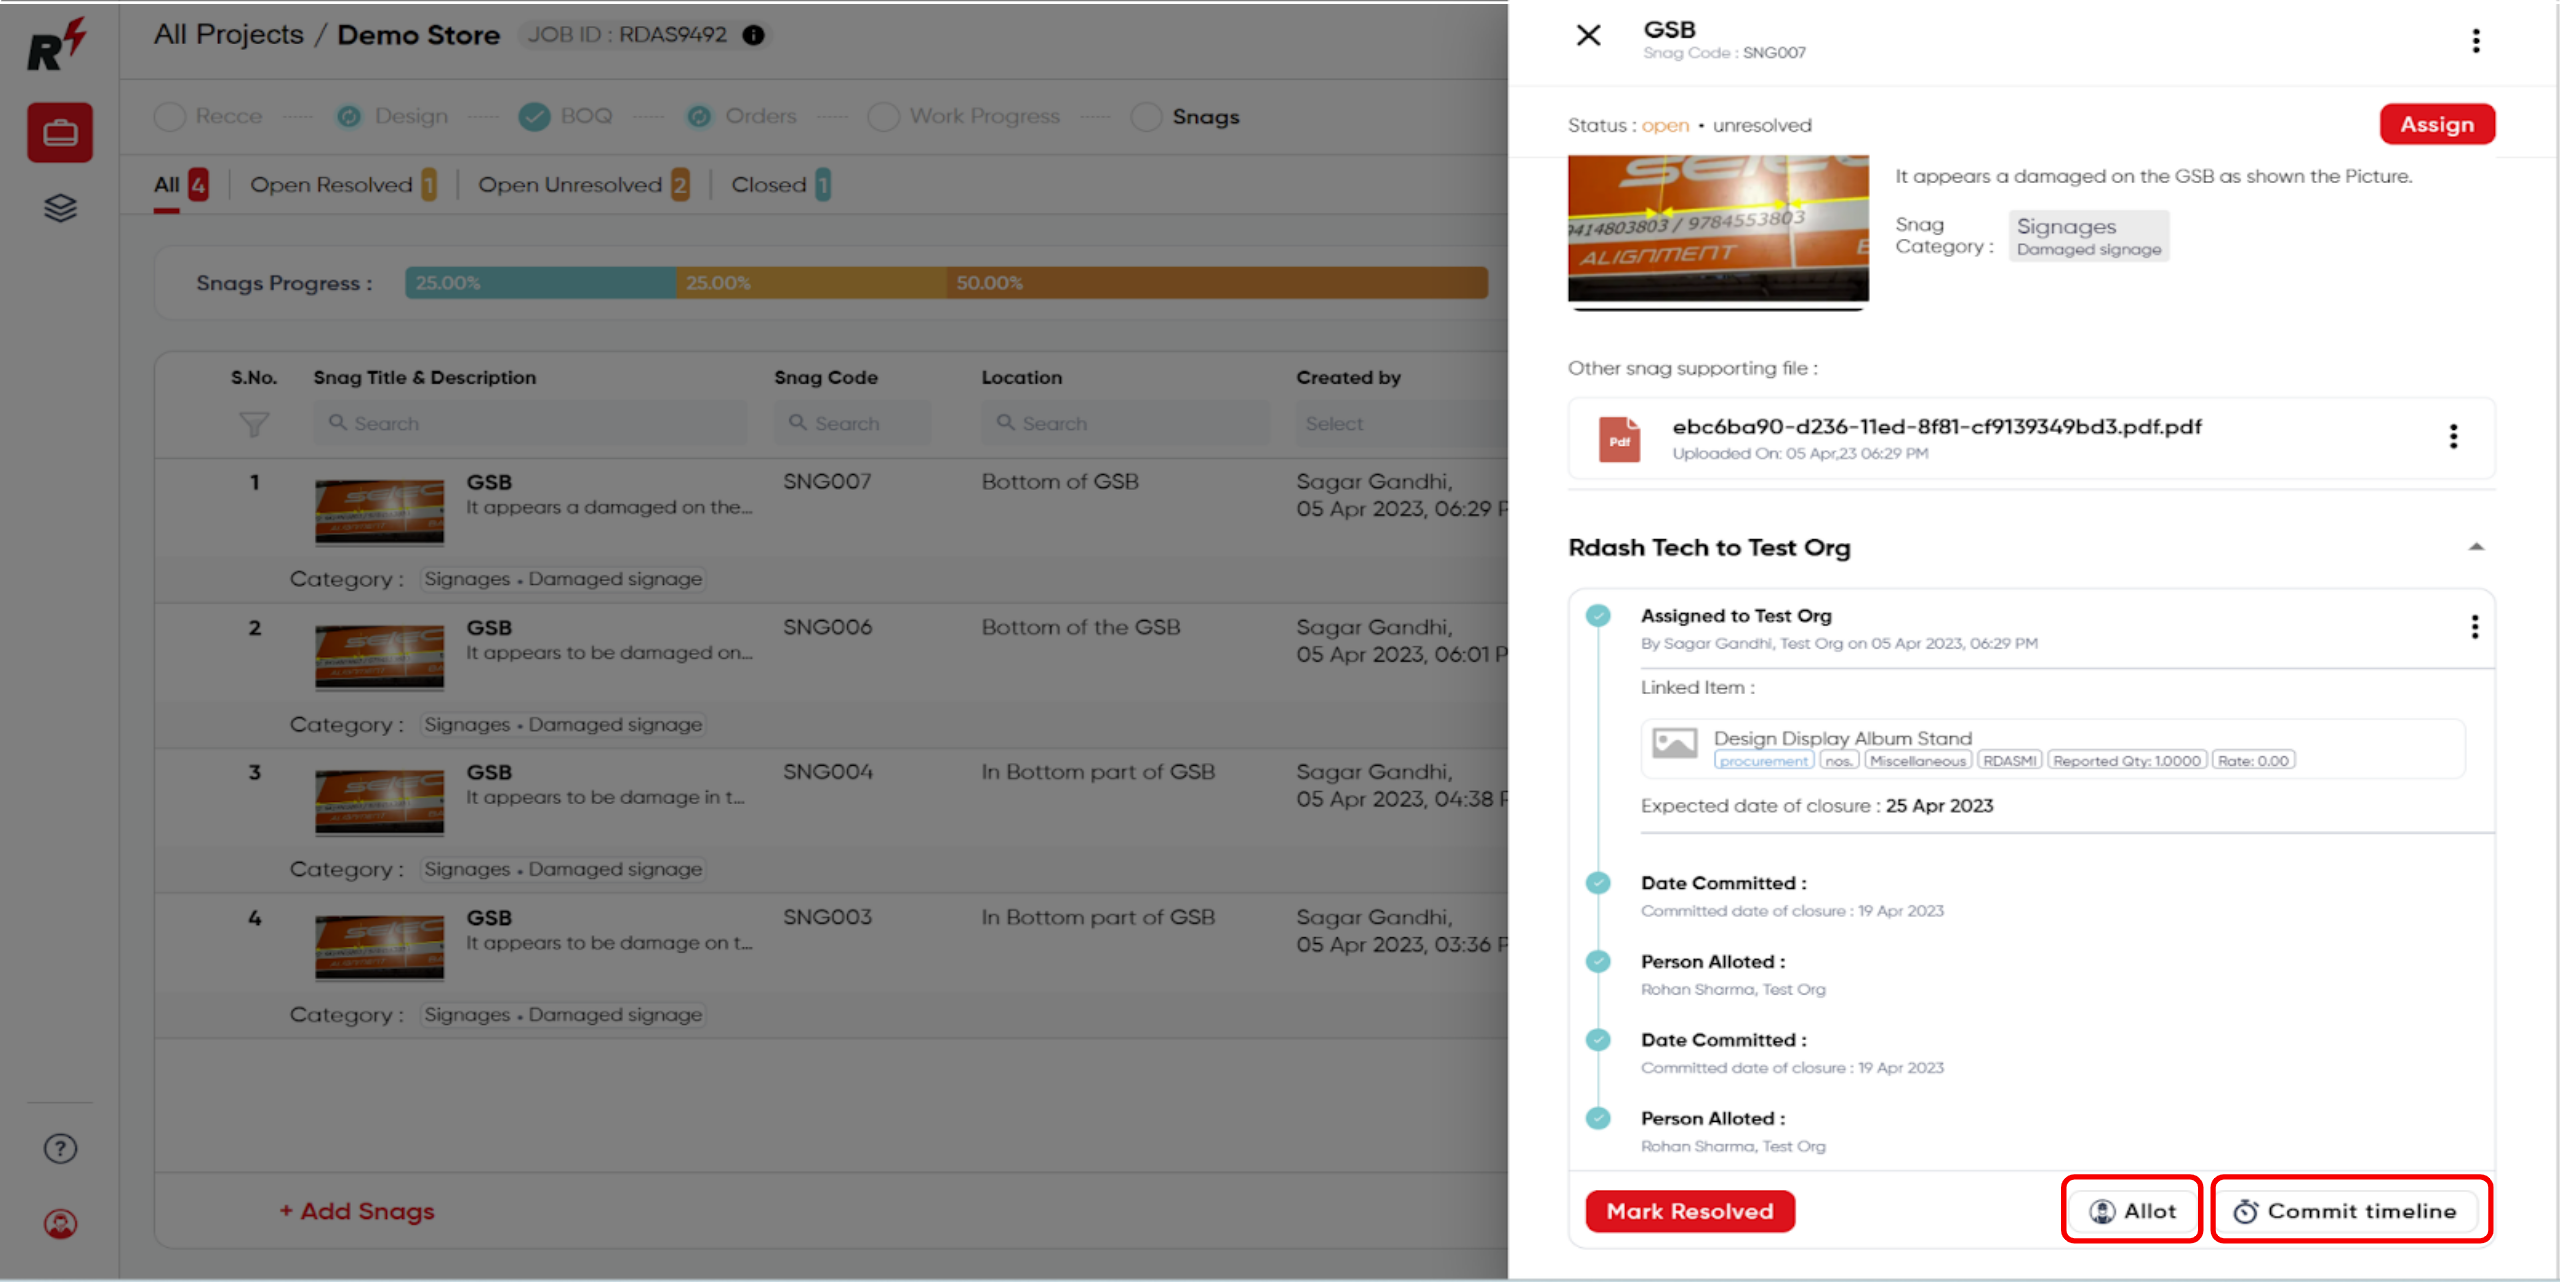
You can assign the snag task to a team member within your organization and set a committed timeline for completion. This will ensure that the person responsible is held accountable for the task.
Once the organization has created the snag on behalf of the client, the vendor can then assign the snag to their own vendor for further action.

The production 91 vendor will resolve the snag for Test Org, and Test Org Vendor will review the image and remarks provided by Production 91 vendor before marking the snag as resolved. The same process will then be followed for Rdash Tech.